
Viper Remote Car Starter Instructions: A Comprehensive Guide
This manual details the installation, operation, and maintenance of your Viper DS4 system, offering convenience and vehicle protection through advanced remote start and security features.
Understanding Your Viper DS4 System
The Viper DS4 is a Bluetooth Digital Remote Start System Module designed to seamlessly integrate with your vehicle’s electronics. It provides remote start functionality, enhanced security features, and convenient control via your smartphone. This system utilizes a sophisticated interface, often requiring an iDatalink BLADE for optimal compatibility, especially with modern vehicles.
Understanding the DS4’s capabilities – including remote start, panic mode, and door lock/unlock functions – is crucial for maximizing its benefits. The system’s programming allows customization of features like trunk release and alarm sensitivity. Proper configuration ensures the alarm doesn’t trigger unintentionally, such as when opening the trunk. Familiarizing yourself with the remote control button functions and advanced features like valet and timer modes will unlock the full potential of your Viper DS4 system.
Key Features and Benefits
The Viper DS4 system delivers a range of impressive features, starting with convenient remote start capability, allowing you to pre-heat or pre-cool your vehicle from a distance. Enhanced security features, including a panic alarm and customizable sensors, provide peace of mind. Bluetooth connectivity enables smartphone control, expanding the system’s functionality and range.
Benefits include increased comfort, especially in extreme weather conditions, and improved vehicle security against theft and vandalism. The DS4’s programmable features, like trunk release and alarm sensitivity adjustment, allow for a tailored user experience. Advanced modes, such as valet and timer, offer additional control and convenience. Ultimately, the Viper DS4 provides a sophisticated and reliable solution for vehicle security and comfort.
System Components Overview
The Viper DS4 system comprises several key components working in harmony. The DS4 module itself is the central processing unit, integrating remote start and security functions. A digital remote control, often with extended range, facilitates system operation. A crucial element is the iDatalink BLADE, which bypasses the vehicle’s factory security system, enabling seamless integration.
Wiring harnesses connect the DS4 module to the vehicle’s electrical system, controlling features like ignition, door locks, and trunk release. Sensors, including a proximity sensor for door locks, enhance security. The system may also include a hood pin switch and a siren for audible alerts. Proper installation ensures all components function correctly, delivering the full range of features and benefits offered by the Viper DS4.

Installation Considerations
Professional installation is highly recommended to ensure proper functionality and avoid potential vehicle electrical system issues when integrating the Viper DS4 system.
Professional Installation Recommended
While experienced DIY enthusiasts might attempt installation, professional installation by a certified technician is strongly advised for your Viper DS4 system. Incorrect wiring can lead to vehicle malfunction, system failure, or even void your warranty. A skilled installer possesses the necessary tools, knowledge of vehicle-specific wiring, and expertise in integrating the system seamlessly.
They will ensure proper connections, including the crucial iDatalink BLADE integration (if applicable), and thoroughly test all functions – remote start, alarm, door locks, and trunk release – to guarantee optimal performance. Professional installation minimizes risks and maximizes the benefits of your Viper system, providing peace of mind and reliable operation for years to come. Don’t compromise your vehicle’s safety and functionality; choose a qualified installer.
iDatalink BLADE Integration
For many modern vehicles, particularly those with complex data networks, the iDatalink BLADE module is essential for a successful Viper DS4 installation. The BLADE acts as a crucial interface, bridging the gap between the Viper system and your vehicle’s onboard computer. It allows for seamless communication, enabling features like factory door lock control, vehicle status updates, and precise remote start functionality.
Using a BLADE eliminates the need for many traditional wire connections, simplifying the installation process and reducing the risk of errors. It’s particularly important when integrating with vehicles like the 2014 Toyota Corolla S. Ensure your installer utilizes the correct BLADE module for your specific vehicle make and model to guarantee full compatibility and optimal system performance;
DS4 Module Specifics
The Viper DS4 is a Bluetooth Digital Remote Start System Module designed for advanced vehicle integration. It offers a robust feature set, including remote start, security alarm capabilities, and smartphone control via Bluetooth connectivity. Understanding the DS4’s specific functionalities is key to maximizing its potential.
This module requires careful configuration to ensure proper operation with your vehicle. Pay close attention to the wiring harness connections and programming procedures outlined in this guide. The DS4 allows for customization of features like lock/unlock sensor configuration and alarm sensitivity adjustment. Remember, overriding the original design by utilizing specific ignition wires requires expertise and should be done cautiously.
Wiring Harness Connections
Proper wiring harness connections are crucial for a successful Viper DS4 installation. Incorrect connections can lead to system malfunction or vehicle damage. Always refer to the vehicle-specific wiring diagram provided with your iDatalink BLADE (if used) or the DS4 system itself.
Carefully identify each wire before making any connections, paying close attention to color coding and function. Ensure all connections are secure and insulated to prevent shorts. When utilizing the (-) ignition and start wires, double-check polarity and confirm compatibility. Remember to configure the system to prevent the alarm from triggering when the trunk is opened. A professional installer can ensure these connections are made correctly and safely.

Programming and Configuration
Configure your Viper DS4 via Bluetooth pairing, adjusting lock/unlock sensors, trunk release, and alarm sensitivity for optimal performance and personalized vehicle security.
Bluetooth Pairing Process
Establishing a secure Bluetooth connection is crucial for utilizing the full functionality of your Viper DS4 system. Begin by downloading the Viper SmartStart mobile application from your device’s app store. Once installed, create an account or log in if you already have one. Ensure your vehicle’s ignition is in the “on” position, but the engine is off. Within the SmartStart app, select “Add Vehicle” and follow the on-screen prompts.
The system will guide you through a verification process, potentially requiring you to enter your vehicle’s information and the Viper system’s serial number. Once verified, the app will search for your DS4 module. Upon discovery, initiate the pairing process. You may be prompted to enter a PIN code displayed on your vehicle or within the app. Successful pairing will grant you remote control access via your smartphone, enabling features like remote start, lock/unlock, and status updates.
Lock/Unlock Sensor Configuration
Proper lock/unlock sensor configuration is vital for seamless operation of your Viper DS4 system, especially with features like remote start and security. The system relies on detecting your vehicle’s door lock/unlock signals. During installation, the installer must correctly connect the lock and unlock wires to the appropriate circuits in your vehicle.
Post-installation, verify the system accurately recognizes door lock/unlock events. Use the programming menu within the SmartStart app or through the system’s manual programming sequence to confirm correct sensor detection. Incorrect configuration can lead to issues like unintended remote starts or false alarm triggers. If the system doesn’t respond correctly, consult your installer to re-check the wiring and sensor settings. Accurate sensor configuration ensures reliable and safe operation.
Trunk Release Configuration
Configuring the trunk release function on your Viper DS4 system requires careful attention to prevent unintended activations and alarm triggers. Your installer must connect the trunk release wire to the vehicle’s trunk release solenoid circuit. It’s crucial to ensure the alarm system doesn’t interpret a trunk opening as a security breach.
During setup, the installer should program the system to ignore the trunk pin switch when the remote start is active. This prevents the alarm from sounding when you remotely open the trunk. Test the trunk release functionality thoroughly after installation, using both the remote and the vehicle’s factory trunk release. If the alarm activates upon trunk opening, revisit the programming settings or consult a professional for assistance. Proper configuration guarantees convenient and secure trunk access.
Alarm Sensitivity Adjustment
Adjusting the alarm sensitivity on your Viper DS4 system is vital to minimize false alarms while maintaining effective security. The system features adjustable sensitivity levels for both shock and glass break sensors. Lower sensitivity reduces the likelihood of triggering the alarm from minor vibrations or ambient noise, but may decrease responsiveness to actual threats.
Higher sensitivity increases responsiveness but elevates the risk of false alarms. Your installer can program the system to suit your vehicle’s environment and your preferences. Test the system after adjustment by gently tapping the vehicle and observing the alarm’s reaction. If false alarms persist, gradually decrease the sensitivity. Refer to the owner’s manual for specific programming instructions and recommended sensitivity levels for optimal performance and reliable protection.

Operating Your Viper System
Effectively utilize features like remote start, panic alarm, door lock/unlock, and trunk release with your Viper DS4, enhancing convenience and vehicle security.
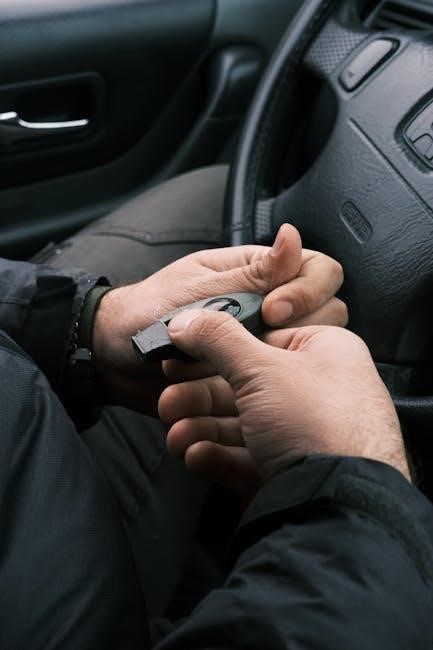
Remote Start Operation
Initiating remote start with your Viper DS4 is straightforward. Press the designated remote start button – typically marked with a car icon – to begin the process. The system confirms operation with light flashes and/or audible chirps. Ensure the vehicle meets all safety requirements, like being in Park or Neutral, before attempting remote start.
The duration of remote start can often be adjusted through programming, offering options like factory-set run times or extended periods. Timer mode, when activated, allows for automatic restarts within a defined timeframe, keeping your vehicle comfortably pre-heated or cooled. Remember to always supervise the vehicle during remote start operation, especially in enclosed spaces. Proper configuration and understanding of your system’s features are key to safe and efficient remote starting.
Panic Mode Activation
Activating Panic Mode on your Viper DS4 system is crucial in emergency situations. Typically, this is achieved by pressing and holding the dedicated panic button on your remote control – often symbolized by an exclamation point. Upon activation, the vehicle’s alarm will sound, and the lights will flash, attracting attention and potentially deterring threats.
The alarm will continue sounding for a pre-programmed duration, or until you deactivate it by pressing the panic button again. Ensure you understand the specific duration set for your system. Panic Mode is designed to provide a rapid response to perceived danger, offering peace of mind and a visible deterrent. Familiarize yourself with the activation process to ensure quick access when needed, enhancing your personal safety and vehicle security.
Door Lock/Unlock Functions
Your Viper DS4 system offers convenient door lock and unlock functionality via your remote control. Pressing the lock button will activate the vehicle’s door locks, securing the interior. Conversely, pressing the unlock button will unlock the doors, granting access. The system is designed to work seamlessly with your vehicle’s existing door lock mechanisms, often utilizing the proximity sensor for accurate operation after installation.
Ensure your installer properly configures the system to recognize your vehicle’s lock/unlock signals. Some systems allow for programmable features like double-unlock, where a second press unlocks the trunk. Understanding these functions enhances usability and security. Verify the range of the remote control for reliable operation, and always confirm door lock status visually after remote activation.
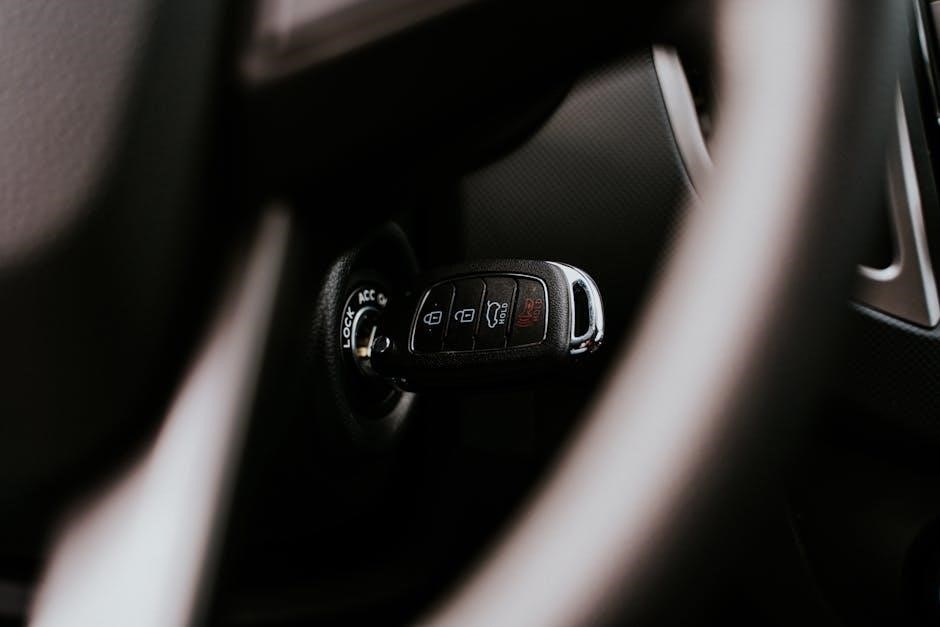
Remote Control Button Functions
Your Viper DS4 remote control provides access to a range of features. The lock/unlock buttons, as previously described, control the vehicle’s door locking system. The remote start button initiates the remote start sequence, warming or cooling the vehicle before entry. A dedicated panic button activates the vehicle’s alarm, sounding the horn and potentially flashing the lights to deter potential threats.
Additional buttons may control features like trunk release or auxiliary outputs, depending on your system’s configuration. Familiarize yourself with each button’s function to maximize the system’s benefits. The range of the remote control can vary, so test it in different locations. Proper battery maintenance is crucial for reliable operation; replace batteries when indicated to ensure consistent performance.

Advanced Features & Troubleshooting
Explore valet mode, timer mode, and sensor bypass options. This section also provides guidance on resolving common issues for optimal system performance and reliability.
Valet Mode Explained
Valet mode is a crucial security feature designed to temporarily disable the remote start functionality of your Viper DS4 system, while still allowing you to use the security features. This is particularly useful when entrusting your vehicle to a valet parking attendant or a mechanic. When activated, the remote start function is blocked, preventing unauthorized use of the system.
To engage valet mode, typically a specific button combination on your remote control is required – consult your owner’s manual for the precise sequence. The system will usually provide an audible or visual confirmation upon activation. While in valet mode, the alarm system remains fully operational, safeguarding your vehicle against theft. Remember to disengage valet mode upon regaining control of your vehicle to restore full system functionality.
Timer Mode Usage
Timer mode allows for pre-programmed remote starts at set intervals, enhancing convenience and vehicle preparedness. Your Viper DS4 system can be configured to automatically start the engine at specified times, ensuring a comfortably warmed-up or cooled interior. This feature is particularly beneficial in extreme weather conditions, eliminating the need for manual remote starts.
To utilize timer mode, programming is typically done through the Viper smartphone app or via a specific sequence using the control button. You’ll set the desired start times and duration. The system will then execute the remote start according to your programmed schedule. Ensure the vehicle meets all safety requirements (parking brake engaged, in park, etc.) before relying on timer mode. Refer to your owner’s manual for detailed programming instructions.
Sensor Bypass Procedures
Sensor bypass is a crucial feature when a door, hood, or trunk sensor malfunctions, preventing the system from arming. Your Viper DS4 allows temporary bypassing of faulty sensors to maintain security functionality. However, it’s vital to understand this is a temporary solution; the underlying issue needs addressing.
Bypassing typically involves a specific sequence using the system’s control button or through the smartphone app. The owner’s manual details the exact procedure for your DS4 model. Once bypassed, the system will arm despite the sensor’s open circuit. Important: Regularly check and repair the faulty sensor. Prolonged bypass compromises security. Document the bypassed sensor for future maintenance and ensure a qualified technician diagnoses and fixes the root cause promptly.
Addressing Common Issues
Several issues can arise with your Viper DS4 system. A common problem is the remote not responding, often due to a low battery – replace it immediately. If the system doesn’t recognize the remote, re-pair it via the Bluetooth pairing process outlined in the manual. Another frequent concern is the alarm triggering falsely; adjust the sensitivity settings to minimize false alarms caused by environmental factors.
If remote start fails, verify the vehicle’s safety features (parking brake, gear selector) are correctly engaged. Check wiring connections if issues persist. For more complex problems, consult your authorized Directed dealer or contact Directed support at 1-800-753-0600. Online resources and downloadable manuals are also available for self-troubleshooting.

Safety and Maintenance
Regular system resets and understanding battery backup functionality are crucial for optimal performance and longevity of your Viper DS4 remote start system.
System Reset Procedures
Occasionally, your Viper DS4 system may require a reset to restore optimal functionality. A full system reset clears the memory and returns the module to its factory default settings. This is particularly useful if you’re experiencing unusual behavior or after disconnecting the battery. To initiate a reset, consult your specific model’s manual, as procedures can vary.
Generally, this involves disconnecting the vehicle’s battery for a specified duration – typically 30 minutes – and then reconnecting it. Following reconnection, you may need to re-pair your remote and reconfigure certain settings, such as the lock/unlock sensors. Remember to document your custom settings before performing a reset to simplify the reconfiguration process. Always refer to the official Viper documentation for precise instructions tailored to your DS4 module.
Battery Backup Information
Your Viper DS4 system incorporates a battery backup to preserve critical settings, such as personalized configurations and learned data, during temporary power interruptions. This backup ensures that your system retains its functionality even after the vehicle’s battery is disconnected or depleted. The backup is typically powered by a small internal capacitor or battery within the DS4 module itself.
However, the battery backup is not intended for prolonged operation without vehicle power. Extended periods of disconnection can eventually deplete the backup, leading to a loss of settings. It’s recommended to minimize the duration of battery disconnections whenever possible. Regularly check the system’s functionality after any battery-related service to confirm the backup is operating correctly and settings are retained.
Warranty Information & Support
Directed Electronics, the manufacturer of Viper, provides a limited warranty covering defects in materials and workmanship for your DS4 system. The warranty period typically begins from the date of original purchase and varies depending on the specific components. Please retain your proof of purchase for warranty claims.
For warranty service or support, contact your authorized Viper dealer. They can assist with troubleshooting, repairs, and warranty claim processing. Alternatively, you can reach Directed Electronics directly at 1-800-753-0600. Detailed warranty information, terms, and conditions are available on the Directed Electronics website. Online resources, including FAQs and troubleshooting guides, are also accessible to assist you with any questions or concerns regarding your Viper system.
Online Resources & Manuals
Viper offers a wealth of online resources to enhance your experience with your DS4 remote start system. You can download comprehensive user manuals in PDF format directly from the Directed Electronics website. These manuals provide detailed instructions, illustrations, and troubleshooting tips.
The website also features an extensive FAQ section addressing common questions and concerns. Browse online operating guides and owner’s manuals for various Viper remote starters, all available for free download. For additional support, explore the Directed Electronics forums where you can connect with other Viper users and share experiences. Visit the back cover of your manual for the specific URL to access these valuable resources and maximize the functionality of your system.