Murray lawn mower manuals provide essential guidance for users, offering detailed instructions on assembly, operation, and maintenance. These resources are available as free PDF downloads online, ensuring easy access to troubleshooting tips, safety guidelines, and parts lists for optimal performance and longevity of your mower.
1.1 Importance of User Manuals for Lawn Mowers
User manuals are crucial for Murray lawn mowers as they provide step-by-step guidance on assembly, operation, and maintenance. These manuals ensure safe usage, proper troubleshooting, and compliance with manufacturer recommendations. They also include essential safety precautions and warranty information, helping users avoid costly repairs. For older models, accessing a free PDF manual is especially valuable, as it offers detailed diagrams and parts lists. Whether you’re a new or experienced user, the manual serves as an indispensable resource to maximize efficiency, ensure longevity, and maintain performance of your Murray lawn mower.
1.2 Overview of Murray Lawn Mower Models
Murray offers a diverse range of lawn mower models designed to suit various lawn care needs. From compact, lightweight push mowers to robust ride-on models, Murray caters to both small and large lawns. Their lineup includes gas-powered, electric, and manual push mowers, ensuring options for different preferences and budgets. Murray also provides mulching and bagging capabilities, enhancing versatility. With a focus on durability and performance, Murray lawn mowers are popular for their reliability and ease of use. Whether you prefer traditional or modern designs, Murray has a model tailored to your lawn maintenance requirements. This variety ensures there’s a Murray mower for every homeowner.

Why Download the Murray Lawn Mower Manual?
Downloading the Murray lawn mower manual provides essential guidance for operation, troubleshooting, and maintenance, ensuring optimal performance and longevity of your equipment.
2.1 Benefits of Having a User Manual
Owning a Murray lawn mower manual offers numerous advantages, including clear operating instructions, troubleshooting tips, and maintenance schedules. It ensures proper usage, enhancing safety and efficiency. The manual provides detailed diagrams and step-by-step guides, making complex tasks manageable. Regular maintenance, as outlined, prolongs the mower’s lifespan and performance. Additionally, it serves as a quick reference for diagnosing issues, saving time and reducing repair costs. Having the manual readily available empowers users to handle repairs confidently, ensuring their Murray lawn mower operates at its best for years to come.
2.2 Safety Guidelines and Precautions
The Murray lawn mower manual emphasizes critical safety guidelines to ensure safe operation. It outlines precautions such as wearing protective gear like gloves, safety glasses, and sturdy footwear. Users are advised to clear the mowing area of debris and keep children and pets away. The manual also stresses pre-operation checks, such as inspecting blades and ensuring all guards are in place. Proper handling techniques and shutdown procedures are detailed to prevent accidents. Adhering to these guidelines minimizes risks and ensures a secure mowing experience.
Where to Find Murray Lawn Mower Manuals
Murray lawn mower manuals are available on the official Murray website or trusted third-party platforms offering free PDF downloads. Always verify the source for authenticity and safety.
- Official Murray website provides authentic manuals for various models.
- Third-party sites like ManualsLib or ManualsOnline offer free downloads.
3.1 Official Murray Website and Resources
The official Murray website is the most reliable source for downloading old Murray lawn mower manuals in PDF format for free. It provides authentic and comprehensive guides tailored to specific models. Users can easily search by model number or product name to find the exact manual they need. The website also offers additional resources, such as troubleshooting guides and maintenance tips, ensuring a seamless experience for Murray lawn mower owners. By using the official site, users can be confident they are accessing safe and accurate information to keep their equipment in optimal condition.
3.2 Third-Party Websites for Manual Downloads
Besides the official Murray website, third-party sites offer free downloads of old Murray lawn mower manuals in PDF format. Websites like ManualsLib, ManualsOnline, and Scribd provide extensive libraries of user manuals for various Murray models. These platforms are convenient for users seeking quick access to manuals without navigating through official channels. However, it’s essential to verify the credibility of these sites to ensure the manuals are accurate and free from malware. Additionally, some forums and DIY communities share manuals uploaded by users, offering another resource for finding specific guides.

Key Sections of the Murray Lawn Mower Manual
Murray manuals include assembly, operation, and maintenance guides, ensuring users understand setup, safe usage, and upkeep for optimal performance and longevity of their lawn mowers.
4.1 Assembly Instructions for New Mowers
The Murray lawn mower manual provides detailed assembly instructions for new mowers, ensuring a smooth setup process. It includes step-by-step guidance for attaching handles, installing blades, and connecting essential components. The manual also lists required tools and safety precautions to follow during assembly. Clear diagrams and illustrations are often included to help users understand complex steps. By following these instructions, users can ensure their mower is properly assembled and ready for safe operation. Proper assembly is crucial for performance and longevity, making this section indispensable for new mower owners.
4.2 Operating Instructions for Safe Usage
The Murray lawn mower manual provides essential operating instructions to ensure safe and effective usage. It outlines pre-operation checks, such as ensuring the area is clear of debris and wearing protective gear like gloves and eyewear. The manual also details proper starting procedures, mowing techniques, and how to handle slopes safely. Additionally, it covers emergency stop procedures and post-operation routines, such as disconnecting the spark plug and cleaning the mower. Following these guidelines helps prevent accidents and prolongs the mower’s lifespan. Safe operation is a priority, and the manual serves as a comprehensive guide for responsible mower usage.
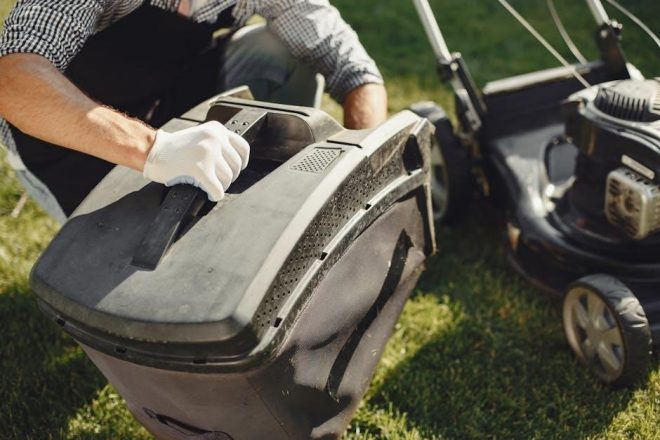
4.3 Maintenance and Repair Guidelines
The Murray lawn mower manual includes detailed maintenance and repair guidelines to keep your mower in optimal condition. Regular tasks like oil changes, blade sharpening, and air filter cleaning are outlined to ensure performance and longevity. The manual also provides troubleshooting tips for common issues, such as uneven cutting or difficulty starting the engine. Step-by-step repair instructions are included for replacing parts like belts or spark plugs. By following these guidelines, users can perform routine upkeep and minor fixes, reducing the need for professional service and extending the mower’s lifespan. Proper maintenance ensures safe and efficient operation.

Safety Precautions in the Manual
The Murray manual emphasizes wearing protective gear, ensuring proper pre-operation checks, and following safe operating practices to prevent accidents and injuries while mowing.
5.1 General Safety Tips for Lawn Mower Usage
Always clear the area of debris and wear protective gear like gloves and eyewear. Ensure the mower is on a level surface and avoid loose clothing. Never let children operate the mower. Keep bystanders at a safe distance and be cautious on slopes. Follow proper handling techniques to maintain control. Ensure all safety guards are in place and functioning. Disconnect the spark plug wire before performing maintenance. Keep the mower well-maintained to avoid unexpected malfunctions. Adhere to these guidelines to ensure safe and effective lawn mowing experiences.
5.2 Protective Gear and Pre-Operation Checks
Always wear protective gear, including goggles, gloves, and sturdy shoes, to minimize injury risks. Conduct pre-operation checks: inspect the mower deck for debris, ensure the blade is sharp, and verify all safety features are functional. Check the handles and controls for tightness and proper operation. Ensure the mower is free from damage or wear. Review the manual for specific pre-start checks tailored to your Murray model. These steps ensure a safer and more efficient mowing experience while adhering to manufacturer recommendations.
Maintenance Tips from the Manual
Regular lubrication of moving parts, air filter checks, and blade inspections are essential; Keep the mower deck clean and ensure proper tire pressure for optimal performance.
6.1 Regular Maintenance Schedule
Regular maintenance is crucial for extending the life of your Murray lawn mower. The manual recommends a detailed schedule, including daily pre-operation checks, weekly inspections of blades and tires, and monthly tasks like oil level checks and air filter cleaning. Seasonal maintenance, such as sharpening blades and replacing spark plugs, ensures optimal performance. By following the schedule, you can prevent breakdowns and maintain efficiency. Always refer to the manual for model-specific timelines and procedures to keep your mower in top condition throughout the year.
6.2 Oil and Filter Change Instructions
The Murray lawn mower manual provides clear steps for oil and filter changes, essential for engine longevity. Drain the old oil into a pan, then remove and replace the oil filter with a new one. Refill the engine with the recommended oil type, as specified in the manual. Regular oil changes prevent engine wear and ensure smooth operation. Always dispose of used oil and filters responsibly. Follow the manual’s guidelines for the correct oil capacity and type to maintain your mower’s performance and extend its lifespan.
6.3 Blade Sharpening and Replacement
The Murray lawn mower manual details how to sharpen or replace blades for optimal cutting performance. Dull blades tear grass, leaving it vulnerable to disease. Sharpen blades using a file or grinder, maintaining the original angle. If damaged or worn, replace blades with Murray-approved parts. Always disconnect the spark plug before servicing. Check blade balance and tighten securely. Regular blade maintenance ensures a clean cut and extends mower life. Refer to the manual for specific blade types and replacement procedures tailored to your model.

Troubleshooting Common Issues
The Murray manual helps diagnose issues like engine failure, poor cutting, or faulty starting. Check fuel, spark plug, and air filter for blockages or wear. Adjust blade height and inspect belts for damage. Addressing these common problems ensures efficient mower operation and longevity.
7.1 Diagnosing Engine Problems
Diagnosing engine problems in your Murray lawn mower begins with identifying symptoms like hard starting, rough running, or failure to start. Check the air filter for blockages and ensure the fuel tank has fresh, correct-grade fuel. A faulty spark plug or ignition coil can prevent the engine from firing. Consult the manual for specific diagnostic steps, such as testing the recoil starter or checking for loose connections. The troubleshooting section provides guidance on common issues and repair solutions. Regular maintenance, as outlined in the manual, can help prevent engine problems and ensure optimal performance. Always reference the manual for accurate diagnostics and repairs.
7.2 Solving Start-Up Issues
Addressing start-up issues with your Murray lawn mower involves checking basic components. Ensure the battery is charged and connections are clean. A faulty spark plug or air filter obstruction can prevent ignition. Verify the choke is functioning correctly and the primer bulb is operating as described in the manual. Check for stale or insufficient fuel, as this can hinder start-up. Consult the troubleshooting guide for step-by-step solutions. Regular maintenance, such as cleaning the carburetor or replacing the spark plug, can resolve many start-up problems. Always follow safety precautions and refer to the manual for specific repair instructions.

Environmental Considerations
Murray manuals emphasize eco-friendly practices, such as proper disposal of old parts and reducing emissions. Follow guidelines to minimize environmental impact while maintaining your lawn mower.
8.1 Eco-Friendly Lawn Mower Practices
Murray manuals highlight eco-friendly practices to promote sustainability. Maintain your mower efficiently to reduce emissions and fuel consumption. Regular tune-ups ensure optimal performance, lowering environmental impact. Use eco-friendly alternatives like electric or battery-powered mowers when possible. Proper disposal of waste, such as old oil and batteries, is essential. Mulch grass clippings instead of bagging to reduce landfill waste. Adjust mowing height to promote healthy grass growth, reducing the need for fertilizers. Seasonal maintenance, like checking air filters, helps minimize environmental footprint. Adopting these practices supports greener lawn care and aligns with Murray’s commitment to environmental responsibility.
8.2 Proper Disposal of Old Mower Parts
Proper disposal of old Murray lawn mower parts is crucial for environmental protection. Always check local regulations for hazardous waste disposal, as items like batteries and oil require special handling. Metal components can be recycled at designated facilities. Drain fluids and remove batteries before disposal. Never dispose of hazardous materials in landfills. Consider donating usable parts to repair shops or recycling centers. Murray encourages responsible disposal to minimize environmental impact. Properly managing waste ensures compliance with local laws and supports sustainable practices. Recycling and safe disposal are key to preserving the environment for future generations.

Legal and Copyright Information
Murray lawn mower manuals are copyrighted, and downloading them requires adherence to legal guidelines. Using the manual is for personal use only, as specified by Murray. Unauthorized distribution or downloading from non-official sources may violate copyright laws. Always ensure you have the right to access and use the manual legally. Consulting Murray or authorized dealers for legitimate copies is recommended to avoid legal issues.
9.1 Understanding Manual Copyrights
Murray lawn mower manuals are protected under copyright laws, meaning their content is owned by Murray or its affiliates. Users are granted permission to use the manual for personal, non-commercial purposes only. Reproducing, distributing, or modifying the content without authorization is prohibited. Copyright laws ensure intellectual property protection, and violating them can lead to legal consequences. Always download manuals from official or authorized sources to ensure compliance with these regulations. Respect for copyright promotes fair use and supports the creation of high-quality resources for consumers.
9.2 Legal Implications of Downloading Manuals
Downloading Murray lawn mower manuals, especially from unauthorized sources, can have legal implications. Copyright infringement is a serious issue, as these manuals are protected by law. Users may face penalties, including fines, for violating copyright laws. It’s important to respect intellectual property rights and adhere to licensing agreements. Always ensure that the source of the manual is legitimate and authorized by Murray or its affiliates. Unauthorized distribution or reproduction can lead to legal consequences. Be cautious of third-party websites offering free downloads, as they may not comply with copyright regulations. Prioritize official sources to avoid legal complications.

Future Trends in Lawn Mower Manuals
Future Murray manuals may feature interactive digital formats, QR codes, and video tutorials for enhanced user experience and easier troubleshooting.
10.1 Digital Manuals and Interactive Guides
Digital manuals are revolutionizing how users interact with Murray lawn mower guides. Interactive features like searchable content, hyperlinks, and embedded video tutorials enhance usability. These digital formats allow for instant access to specific sections, reducing the need for physical storage. Murray may incorporate augmented reality (AR) to provide visual guidance for complex tasks. Additionally, digital manuals can be easily updated, ensuring users always have the latest information. This shift toward interactive guides not only improves user experience but also supports environmentally friendly practices by reducing paper usage. The future of Murray manuals lies in dynamic, tech-driven solutions.
10.2 Integration of QR Codes and Videos
The integration of QR codes and videos in Murray lawn mower manuals enhances user experience by providing quick access to visual guides and tutorials. QR codes embedded in the manual link to instructional videos, demonstrating complex procedures like assembly or maintenance. This feature simplifies troubleshooting and ensures users follow safety protocols accurately. Videos also cover topics like blade sharpening and oil changes, offering step-by-step instructions. By combining digital and traditional formats, Murray manuals cater to both tech-savvy users and those who prefer hands-on learning. This innovative approach improves efficiency and reduces errors, making lawn mower maintenance more accessible for everyone.
11.1 Summarizing the Importance of Manuals
A Murray lawn mower manual is essential for optimal performance and safety. It provides clear instructions for assembly, operation, and maintenance, ensuring users get the most from their equipment. The manual enhances safety by outlining precautions and proper usage guidelines. Regular maintenance, as detailed in the manual, extends the lifespan of the mower and prevents costly repairs. Additionally, it serves as a troubleshooting guide for common issues, saving time and effort. Accessing the manual for free as a PDF ensures convenience and accessibility for all users, making it a valuable resource for proper lawn mower care.
By following the manual, users can ensure their mower operates efficiently while adhering to environmental standards. It also helps in understanding warranty terms and legal responsibilities. Overall, the manual is a comprehensive guide that covers everything from basic setup to advanced maintenance, making it indispensable for Murray lawn mower owners. Always refer to the manual for accurate and reliable information to keep your mower in top condition.
11.2 Final Tips for Murray Lawn Mower Users
For optimal performance and longevity of your Murray lawn mower, always follow the manufacturer’s guidelines in the manual. Regular maintenance, such as oil changes and blade sharpening, ensures efficiency. Store your mower properly during off-seasons to prevent damage. Familiarize yourself with safety precautions to avoid accidents. When downloading manuals, verify the source for accuracy and compatibility with your model. Keep the manual handy for quick reference and troubleshooting. By adhering to these tips, you’ll extend the life of your mower and enjoy a well-manicured lawn effortlessly.

Additional Resources
Explore official Murray websites, customer support, and authorized dealers for genuine manuals and parts. Visit community forums for user-generated guides and troubleshooting tips.
12.1 Murray Customer Support Contact Information
For assistance with your Murray lawn mower, including manual downloads, contact Murray customer support. Visit their official website and navigate to the “Support” section for contact details. You can reach them via phone at 1-800-828-5500 or email through their online contact form. Additionally, the Murray website offers a “Where to Buy” feature to locate authorized dealers. Check their site for specific support hours and availability. Murray’s customer service team can help with manual downloads, troubleshooting, and general inquiries about your lawn mower model.
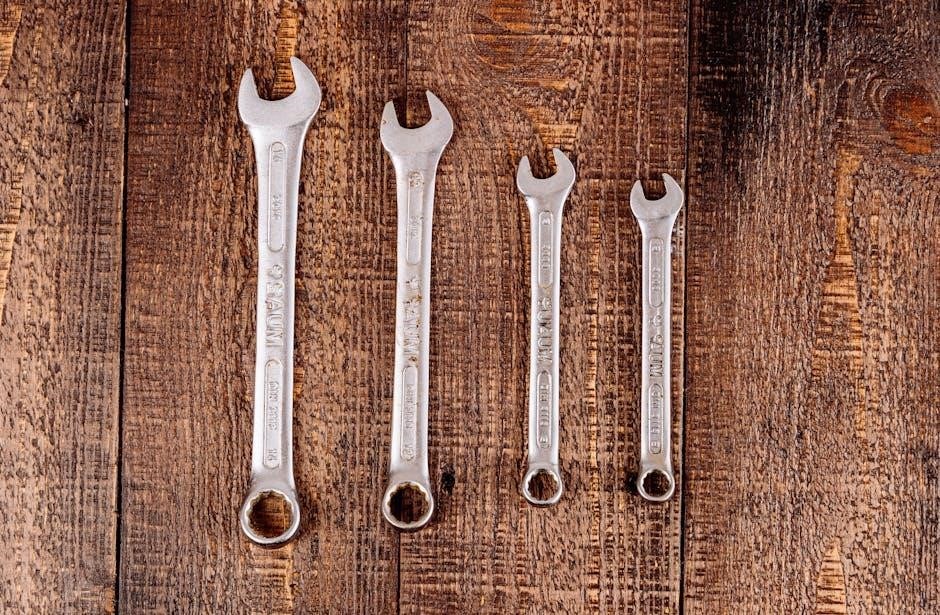
12.2 Recommended Tools for Lawn Mower Maintenance
To maintain your Murray lawn mower effectively, having the right tools is essential. A socket set and screwdrivers are must-haves for adjustments and repairs. A multimeter can help diagnose electrical issues, while gloves and safety goggles ensure protection. A drain pan is useful for oil changes, and a wire brush can clean debris from the mower deck. Sharpening tools, like a grinder or file, keep the blade in optimal condition. Regularly having these tools on hand ensures your mower runs efficiently and safely, preventing costly repairs and downtime. Always refer to your manual for specific recommendations.