Cataclysm Skinning Guide: An Overview (01/24/2026 07:34:42)
This comprehensive guide details leveling Cataclysm skinning, from 1-525, offering optimal zones and efficient farming techniques for maximizing your profits and skill gains.
Skinning in Cataclysm represents a significant shift, demanding a focused approach for efficient leveling and profit maximization. The revamped zones introduce new creatures and, consequently, unique hides crucial for Leatherworking and First Aid. This guide serves as your roadmap to navigate these changes, ensuring you quickly reach the maximum skill level of 525.
Unlike previous expansions, Cataclysm skinning benefits greatly from strategic zone selection and understanding material demands. Simply skinning every beast encountered won’t yield optimal results. We’ll explore prime locations, considering mob density, respawn rates, and the value of the resulting materials. Mastering these elements is key to a rewarding skinning experience within the shattered world of Azeroth.
Why Skinning in Cataclysm?
Cataclysm skinning offers substantial benefits beyond simply acquiring leather. It’s a vital profession for Leatherworkers, providing the core materials for crafting powerful gear and items. Furthermore, the hides obtained are essential for First Aid, enabling the creation of bandages and healing potions crucial for both PvE and PvP content.
The demand for Cataclysm-era leather remains consistently high, translating into a reliable gold source. Efficient skinners can capitalize on this demand by strategically farming and selling their materials on the Auction House. Moreover, leveling skinning alongside another gathering profession, like Herbalism or Mining, creates a synergistic income stream, maximizing your overall profitability within the game.

Leveling Skinning 1-525
Achieving 525 skill requires strategic zone selection and consistent practice. This section outlines the most efficient leveling paths, maximizing gains and minimizing wasted effort.
Skinning Locations 1-300
Early skinning levels (1-300) are best attained in the starting zones of Azeroth; Focusing on beasts and humanoids provides consistent skinning opportunities. Venture into areas like Elwynn Forest, Durotar, or Mulgore, targeting boars, wolves, and harpies. These creatures are plentiful and offer readily available hides.
As you progress, move towards zones like Westfall, Redridge Mountains, or the Barrens. Remember to prioritize mobs that are your level or slightly below for quicker skinning times. Avoid higher-level creatures initially, as failed skinning attempts yield no experience or materials. Consistent skinning while questing will naturally boost your skill during this phase, making it a seamless process.
Don’t overlook the value of skinning everything you can; even lower-quality hides contribute to skill gains.
Optimal Zones 300-400
Reaching skill level 300-400 in Cataclysm skinning requires venturing into more challenging zones. Mount Hyjal and Vashj’ir are excellent choices, offering a diverse range of skinnable creatures. Focus on the wildlife within these areas, specifically those yielding Heavy Leather.
Deepholm also presents a viable option, though competition can be higher. Prioritize areas with dense mob populations to maximize your skinning rate. Remember to utilize skinning knives to increase your success rate and reduce skinning time.
Consistent farming in these zones will quickly advance your skill. Consider grouping with other players to clear areas efficiently and minimize downtime between skins.
Efficient Farming 400-525
Pushing from 400 to 525 in Cataclysm skinning demands strategic zone selection and efficient farming techniques. Uldum is a prime location, teeming with creatures dropping Volcanic Leather. The Twilight Highlands also offer excellent opportunities, particularly around the Kael’thas Sunstrider’s area.
Focus on maximizing your skinning speed by utilizing a high-quality skinning knife and minimizing travel time. Consider utilizing flight paths to quickly navigate between dense mob locations.
Grouping with others can significantly increase efficiency, allowing for faster clearing of mobs and reduced competition for nodes. Consistent effort in these zones will swiftly bring you to the skill cap.

Skinning Trainers and Costs

Locate skinning trainers throughout Azeroth to learn new ranks. Costs vary by level, increasing as your skill grows, requiring gold for each advancement.
Trainer Locations by Level Range
For levels 1-75, you’ll find Skinning trainers in most major cities. Specifically, look for them in the Trade District of Stormwind for Alliance characters, and the Valley of Trials in Orgrimmar for Horde players. These early trainers provide the foundational skills needed to begin your skinning journey.
As you progress to levels 75-150, continue visiting the same cities, as the trainers there will update their skills. Between levels 150-250, check with trainers in larger hubs like Dalaran (Northrend) or Shattrath City (Outland).
Finally, for levels 250-350 and beyond, trainers are available in major Cataclysm zones like Mount Hyjal and Vashj’ir. Remember to check frequently, as trainer locations and skill offerings can change with expansions!

Skinning Skill Cost Breakdown
Initial skill-ups in Cataclysm skinning are relatively inexpensive, costing only a few gold per point. However, the cost increases exponentially as you approach higher skill levels. Expect to pay around 5-10 gold for the first 50 points, gradually rising to 20-30 gold between levels 200-300.
The most significant expense occurs when learning the final ranks of the skill, from 450 to 525. These skill increases can cost upwards of 50-100 gold each, demanding a substantial investment.
Consider supplementing your gold income through gathering other professions or selling excess materials to offset these costs. Efficient farming and smart resource management are crucial for minimizing the financial burden of maxing out your skinning skill.

Cataclysm Skinning Materials and Uses
Skinned materials are vital for Leatherworking, creating durable armor and items. They also provide crucial components for First Aid, crafting bandages and healing supplies.
Primary Materials Gained
Cataclysm skinning yields a diverse range of leather and hides, essential for crafting professions. Early levels primarily provide Rough Leather, used in lower-level Leatherworking recipes. As your skill increases, you’ll begin acquiring Thick Leather, a more durable material.
Further progression unlocks Rugged Leather, highly sought after for its strength. At higher skill levels (400+), Heavy Leather becomes available, crucial for end-game gear. Additionally, skinning often yields Brawn, a valuable byproduct used in various crafting processes. Rarely, you may also find Vein and Sinew, used in specific Leatherworking and First Aid recipes, adding to the profitability of skinning.
The specific materials gained depend heavily on the creature being skinned and your current skinning skill level.
Leatherworking Synergies
Skinning and Leatherworking exhibit a powerful synergy in Cataclysm. As a skinner, you directly supply the raw materials Leatherworkers desperately need, creating a self-sufficient crafting loop. This allows Leatherworkers to avoid expensive auction house purchases, boosting their profit margins.
Having both professions eliminates material costs for many recipes, significantly increasing crafting efficiency. Heavy Leather, obtained through high-level skinning, is vital for crafting powerful armor and gear. Skinned materials are used to create drums, providing stat boosts for raids and dungeons.
Furthermore, selling excess leather on the auction house provides a consistent income stream, complementing Leatherworking profits. This dual-profession approach is highly recommended for maximizing gold generation.
First Aid Applications
While seemingly unrelated, skinning indirectly benefits First Aid in Cataclysm. Though skinning doesn’t directly create First Aid materials, the gold earned from selling skinned hides provides the funds necessary to purchase herbs. These herbs are crucial for crafting bandages and healing potions.
Consistent income from skinning allows for a steady supply of high-quality First Aid reagents, ensuring preparedness for challenging content. A well-stocked First Aid kit is essential for raiding, dungeons, and even solo leveling, reducing downtime and increasing survivability.
Investing in First Aid alongside skinning creates a self-reliant character, capable of both resource gathering and self-healing, a valuable asset in any situation.

Maximizing Skinning Efficiency
Utilize a quality skinning knife to increase yield and speed, and consider combining skinning with other professions for a streamlined leveling experience.
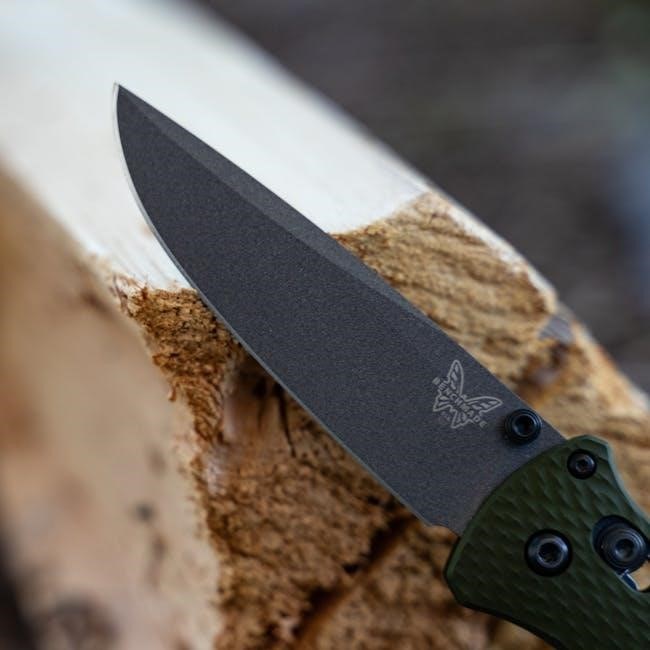
Utilizing Skinning Knives
Employing the correct skinning knife is paramount for maximizing efficiency in Cataclysm. While any skinning knife will suffice, upgrading to a higher-quality option significantly boosts your skinning speed. This translates directly into more materials gathered per hour, accelerating your skill progression and profit potential.
Several knives are available throughout Cataclysm, obtainable through vendors, quests, or crafted by Leatherworking. Consider investing in a knife with a skill bonus, especially when leveling. Remember to regularly check the Auction House for affordable upgrades. A superior knife isn’t just about speed; it’s about optimizing your time and resource acquisition, making the entire skinning process far more rewarding.
Skinning While Leveling Other Professions
Combining skinning with other professions offers a synergistic leveling experience in Cataclysm. If you’re also leveling Leatherworking, skinning provides a consistent, self-sufficient source of materials, reducing reliance on the Auction House and boosting crafting efficiency. Similarly, pairing skinning with First Aid allows for immediate utilization of the gathered leather, creating bandages for both personal use and potential sales.
Even without direct synergies, skinning serves as a profitable supplementary profession. While questing or dungeon running, actively skinning beasts encountered provides a steady income stream. This passive income can fund other profession leveling costs or contribute to overall gold accumulation, making it a valuable addition to any character’s skillset.

Modular Fencing for Material Storage
Efficiently organize your Cataclysm skinning materials with modular fencing systems, offering scalable storage solutions for warehouses and basements, maximizing space.
Complete Fence Systems Overview
Complete fence systems provide robust and adaptable solutions for storing the vast quantities of leather and scales acquired through Cataclysm skinning. Kits are available in varying heights – 4, 6, or 8 feet – and widths of 6 or 8 feet, allowing customization to fit your storage needs.
These systems boast durable, heavy-steel construction and a patented design, ensuring quick and efficient assembly. Modular nature allows for easy expansion as your skinning endeavors grow, accommodating new warehouse sections or extended storage areas. They are ideal for creating secure enclosures for valuable materials, protecting them from theft or damage. Consider these systems for optimal organization and security of your hard-earned Cataclysm skinning resources.
Maintenance of Modular Fencing
Modular fencing systems designed for material storage, crucial for Cataclysm skinning profits, are notably low-maintenance. The materials used resist weathering, decay, and pest infestations, ensuring long-term durability and reducing the need for frequent repairs or replacements. Regular inspection for loose connections or damaged panels is recommended, but generally, these fences require minimal upkeep.

Unlike traditional fencing, modular systems allow for easy replacement of individual components if damage occurs, avoiding costly full-fence repairs. Cleaning is typically simple – a wash with mild soap and water will suffice. This minimal maintenance frees up your time to focus on maximizing your skinning efficiency and accumulating valuable Cataclysm materials.
Cost-Effectiveness of Panel Fencing
Panel fencing presents a highly cost-effective solution for storing the substantial volume of materials generated while leveling Cataclysm skinning. Its modular nature allows for scalable expansion – adding sections as your needs grow, avoiding the upfront expense of a large, fixed structure. Compared to building permanent enclosures, panel fencing significantly reduces labor and material costs.
The durability of these systems minimizes long-term expenses associated with repairs and replacements. Furthermore, the ability to reconfigure the fencing offers flexibility for adapting to changing storage requirements. This adaptability, combined with the initial cost savings, makes panel fencing a smart investment for any serious Cataclysm skinner aiming to maximize profitability.