Trailer Guide Post: A Comprehensive Overview (Updated 02/26/2026)

Today’s date is 02/26/2026. Trailer guide posts enhance safety during coupling‚ utilizing various materials like steel and polyethylene‚ and require careful installation and maintenance.
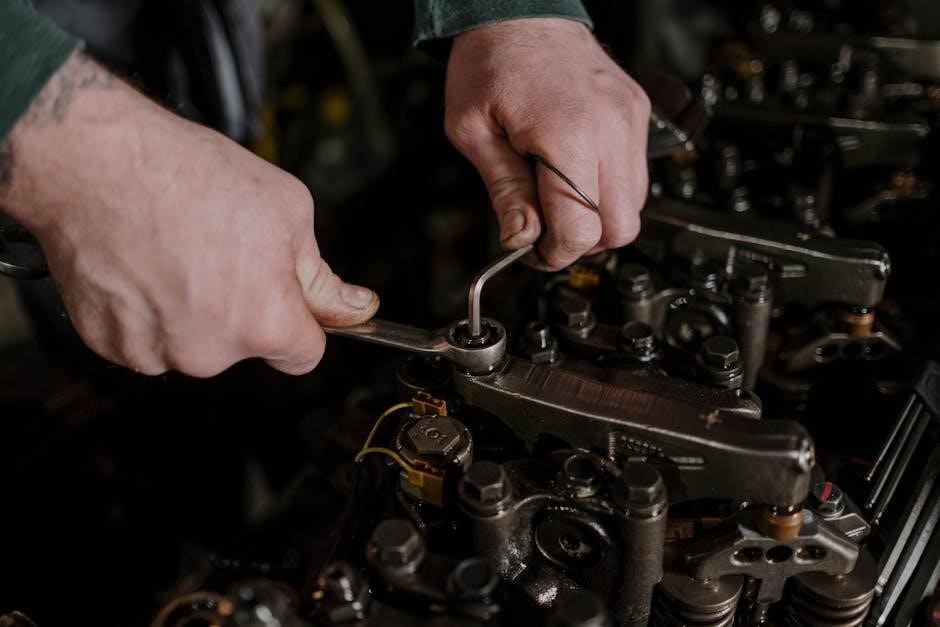
Trailer guide posts are crucial components for safe and efficient trailer maneuvering‚ particularly during the often-challenging coupling process. They act as visual and physical aids‚ directing the trailer’s movement into the hitch receiver. Modern systems even integrate video cameras for enhanced visibility‚ as seen with vehicle setups utilizing multiple rear and side cameras.
Properly installed guide posts‚ whether fixed‚ adjustable‚ or wheel chock style‚ minimize the risk of damage to both the towing vehicle and the trailer. Understanding their purpose and correct application is paramount for all trailer users‚ from recreational campers to those utilizing hitches for professional transport.
What are Trailer Guide Posts and Their Purpose?
Trailer guide posts are structural elements installed on either side of a trailer hitch‚ designed to facilitate smooth and accurate alignment during coupling. Their primary purpose is to guide the trailer’s drawbar into the hitch receiver‚ preventing accidental impacts and potential damage. They significantly reduce the frustration often associated with backing up a trailer.
These posts serve as both visual cues and physical barriers‚ ensuring the trailer tracks correctly. They are essential for users with varying levels of towing experience‚ contributing to safer and more controlled trailer connections.
Types of Trailer Guide Posts

Trailer guide posts come in several configurations to suit diverse towing needs. Fixed guide posts offer a permanent‚ rigid alignment solution‚ ideal for frequent trailer users. Adjustable guide posts provide flexibility‚ accommodating different trailer widths and hitch setups.
Wheel chock style guide posts combine guidance with an added layer of security‚ preventing trailer roll during connection. Selecting the appropriate type depends on the frequency of use‚ trailer size‚ and desired level of adjustability.
Fixed Trailer Guide Posts
Fixed trailer guide posts represent a robust and dependable solution for consistently aligning trailers with towing vehicles. These posts are permanently mounted‚ offering unwavering stability during the crucial hitching process. Their inherent rigidity makes them particularly well-suited for operations involving frequent trailer connections;
Installation typically involves securely bolting the posts to a concrete pad or similar stable surface‚ ensuring long-lasting performance and minimizing movement during use.
Adjustable Trailer Guide Posts
Adjustable trailer guide posts offer a versatile solution for varying trailer and vehicle combinations. Unlike fixed posts‚ these can be repositioned to accommodate different hitch types and trailer widths‚ enhancing operational flexibility. This adaptability is crucial in environments where multiple trailers are used.
Adjustment mechanisms often involve sliding or telescoping designs‚ allowing for precise alignment. Regular inspection of locking mechanisms is vital to maintain secure positioning.
Wheel Chock Style Guide Posts
Wheel chock style guide posts integrate the guiding function with trailer braking security. These posts physically restrain the trailer wheels during coupling‚ providing an extra layer of safety beyond alignment. They are particularly useful on inclines or uneven surfaces where rollaway is a concern.
Robust construction is essential‚ ensuring they withstand trailer weight and maneuvering forces. Periodic checks for wear and proper engagement are crucial for reliable operation.
Materials Used in Trailer Guide Post Construction
Trailer guide posts are constructed from diverse materials‚ each offering unique advantages. Steel provides exceptional durability and strength‚ ideal for heavy-duty applications and resisting significant impact. Aluminum offers a lightweight alternative‚ simplifying installation and reducing overall weight.
Polyethylene excels in corrosion resistance‚ making it suitable for harsh environments. Material selection depends on trailer type‚ usage frequency‚ and budget considerations;
Steel Trailer Guide Posts – Durability and Strength
Steel trailer guide posts are renowned for their robust durability and exceptional strength‚ making them a preferred choice for demanding applications. They withstand significant impacts and resist deformation‚ ensuring long-term reliability. This material is particularly beneficial for heavier trailers and frequent use scenarios.

Despite potential for corrosion‚ protective coatings extend their lifespan‚ offering a cost-effective and dependable solution.
Aluminum Trailer Guide Posts – Lightweight Options
Aluminum trailer guide posts present a compelling alternative‚ prioritizing lightweight construction without significantly compromising strength. This characteristic simplifies installation and reduces the overall weight burden on the towing vehicle. They are particularly advantageous for users seeking ease of handling and maneuverability.
While generally corrosion-resistant‚ aluminum may require protective treatments in harsh environments.
Polyethylene Trailer Guide Posts – Corrosion Resistance
Polyethylene trailer guide posts excel in environments prone to corrosion‚ offering exceptional resistance to rust and weathering. This makes them ideal for marine applications or regions with heavy salt exposure‚ minimizing long-term maintenance and replacement costs.
Despite being less strong than steel‚ polyethylene provides sufficient durability for many applications‚ coupled with a lighter weight.
Installation of Trailer Guide Posts
Proper installation is crucial for trailer guide post effectiveness and safety; It begins with careful site preparation‚ ensuring a level and stable surface for secure mounting. Securing the posts firmly to the ground—potentially involving removing existing tie-down brackets and utilizing carriage bolts—is paramount.
Correct installation prevents shifting during use‚ safeguarding against potential damage or accidents.
Site Preparation for Guide Post Installation
Before installing trailer guide posts‚ meticulous site preparation is essential. This involves identifying a level area capable of supporting the posts’ weight and anticipated forces. Removing any obstructions‚ like existing brackets (discarding associated bolts)‚ ensures a flush mount.
Confirming adequate space around the posts facilitates easy trailer maneuvering and prevents accidental contact during coupling procedures.
Securing Guide Posts to the Ground
Properly securing trailer guide posts is paramount for stability and safety. Depending on the surface‚ methods vary from concrete embedding to robust bolting to the vehicle frame rail. Utilizing carriage bolts and blocks provides a strong connection‚ resisting twisting forces during trailer maneuvers.
Ensure posts are plumb and aligned before final tightening‚ guaranteeing accurate trailer guidance.
Safety Considerations When Using Trailer Guide Posts
Prioritizing safety when utilizing trailer guide posts involves meticulous attention to detail. Proper spacing and alignment are crucial‚ preventing damage to both the trailer and the vehicle. Enhanced visibility through reflectivity is essential‚ particularly during low-light conditions.
Regular inspection for wear and tear ensures continued functionality‚ safeguarding against potential failures during critical coupling operations.
Proper Spacing and Alignment
Achieving optimal trailer coupling relies heavily on precise guide post spacing and alignment. Incorrect positioning can lead to damage during maneuvering‚ potentially impacting the hitch receiver or trailer components. Careful consideration must be given to the trailer’s width and the vehicle’s hitch setup.
Maintaining parallel alignment prevents binding and ensures a smooth‚ controlled connection.
Visibility and Reflectivity
Ensuring trailer guide posts are highly visible is paramount for safe operation‚ especially during low-light conditions. Integrating reflective materials significantly enhances their detectability‚ alerting drivers to their presence and minimizing the risk of accidental contact.
Bright colors and strategically placed reflectors are crucial for preventing collisions and facilitating easier trailer maneuvering.
Trailer Hitch Compatibility and Guide Posts
Guide post selection must align with the trailer hitch class. Class 1 & 2 hitches‚ rated up to 250 pounds‚ require appropriately sized guide posts for safe maneuvering. Utilizing a 50mm square hitch receiver necessitates compatible guide post integration for stability.
Proper matching ensures secure trailer positioning and prevents damage during coupling procedures;
Class 1 & 2 Hitches and Guide Post Use
For Class 1 and 2 hitches‚ typically rated around 250 pounds‚ guide posts are crucial for controlled trailer alignment. These lighter-duty hitches benefit significantly from guide posts‚ minimizing the risk of accidental disconnects or damage during maneuvering;
Selecting appropriately sized posts is vital for optimal performance and safety with these hitch classes.

50mm Square Hitch Receivers & Guide Post Integration
Integrating guide posts with 50mm square hitch receivers‚ like the FHS24 model‚ requires careful consideration of receiver compatibility. These receivers often support heavier loads‚ demanding robust guide post construction and secure mounting.
Proper alignment is key; ensure the posts complement the receiver’s geometry for smooth trailer insertion and reliable guidance during coupling procedures.
Guide Posts for Specific Trailer Types

Different trailer types necessitate tailored guide post solutions. Fifth wheel trailer guide posts require substantial strength due to the high vertical loads involved in coupling. Camper trailers‚ conversely‚ may benefit from adjustable posts accommodating varied hitch heights.
Selecting the appropriate guide post ensures optimal alignment and minimizes the risk of damage during maneuvering and connection‚ enhancing overall towing safety.
Fifth Wheel Trailer Guide Posts
Fifth wheel trailer guide posts demand robust construction to withstand significant vertical and horizontal forces during coupling. These posts often feature heavy-duty steel construction and are permanently mounted‚ providing unwavering stability.
Proper alignment is crucial; guide posts must precisely match the kingpin location. Regular inspection for wear and tear is essential to maintain safe and reliable operation‚ preventing costly damage.

Camper Trailer Guide Posts
Camper trailer guide posts prioritize ease of use and compatibility with various hitch types‚ including class one and two hitches. Adjustable designs are common‚ accommodating different trailer widths and ensuring a secure connection.
Visibility is key; reflective elements enhance safety during low-light conditions. These posts often integrate with video camera systems for improved maneuvering‚ particularly useful for solo operators.
Calculating Characteristic Values for Drawbar Assemblies (EC Directive 94/20EC)
EC Directive 94/20EC mandates calculating characteristic values for drawbar assemblies‚ crucial for safe towing. The ‘V’ value calculation determines permissible vertical load‚ impacting guide post design and load distribution.
This ensures compatibility between vehicles and trailers‚ particularly fifth wheel couplings. Accurate calculations are vital for adherence to safety standards and preventing instability during transit‚ influencing guide post specifications.
Understanding the ‘V’ Value Calculation
The ‘V’ value‚ per EC Directive 94/20EC‚ represents the maximum vertical load a drawbar assembly can handle. This calculation considers trailer weight‚ hitch characteristics‚ and suspension geometry‚ directly influencing guide post load capacity.
A correctly determined ‘V’ value ensures stability and prevents jackknifing. It’s essential for selecting appropriate guide posts and hitches‚ guaranteeing safe trailer maneuvering and adherence to legal towing limits.
Trailer Suspension and Guide Post Interaction
Trailer suspension significantly impacts guide post requirements; stiffer suspensions transmit more force‚ demanding robust posts. Conversely‚ air-ride or torsion suspensions offer cushioning‚ potentially allowing for lighter-duty guide post designs.
Understanding suspension type is crucial for proper alignment and spacing. Guide posts must compensate for suspension movement during coupling‚ preventing binding or damage‚ ensuring smooth and secure trailer attachment.
Impact of Suspension Type on Guide Post Needs
Leaf spring suspensions‚ common in heavier trailers‚ require sturdier guide posts due to their inherent rigidity and potential for shock transfer during maneuvering. Torsion suspensions‚ offering more compliance‚ may permit lighter-weight guide post solutions.
Air ride systems‚ providing adjustable cushioning‚ necessitate precise guide post alignment to accommodate varying ride heights. Proper selection ensures optimal coupling and minimizes stress on both trailer and towing vehicle components.
Guide Post Maintenance and Inspection
Regularly inspect trailer guide posts for bending‚ cracking‚ or corrosion – especially steel components. Check mounting hardware for tightness and ensure proper alignment remains consistent. Worn or damaged posts should be promptly repaired or replaced to prevent coupling failures.
Lubricate adjustable mechanisms to maintain smooth operation. Visibility features‚ like reflectors‚ must be clean and functional. Consistent maintenance extends guide post lifespan and enhances overall towing safety.
Regular Checks for Wear and Tear
Consistent visual inspections are crucial; examine guide posts for any signs of physical damage‚ including dents‚ bends‚ or cracks in the material. Pay close attention to weld points and mounting brackets for corrosion or fatigue.
Check for loose bolts or hardware‚ and ensure reflective elements remain securely attached and clean for optimal visibility. Address any issues immediately to maintain safe trailer maneuvering.
Repairing or Replacing Damaged Guide Posts
Minor damage‚ like surface corrosion‚ might be addressed with appropriate coatings‚ but severely compromised posts require replacement. Prioritize safety; never attempt to weld or repair structurally critical components without professional expertise.
When replacing‚ ensure the new post matches the original specifications for compatibility and load capacity. Securely fasten all hardware‚ verifying proper alignment before resuming trailer operations.
Advanced Systems: Video Camera Integration for Trailer Maneuvering
Integrating video cameras significantly enhances visibility during trailer maneuvering‚ complementing guide posts. Systems utilizing cameras on the vehicle and trailer rear‚ and even door mirrors‚ provide a comprehensive view.
This technology minimizes blind spots‚ aiding precise alignment with the hitch‚ and reducing the risk of contact with the guide posts themselves. It’s a valuable addition for safer‚ easier coupling.
Using Cameras with Guide Posts for Enhanced Visibility
Combining video cameras with trailer guide posts creates a superior maneuvering system. Cameras mounted at the rear of the vehicle and on side mirrors offer a panoramic view‚ eliminating blind spots traditionally problematic during hitching.
This setup allows drivers to precisely monitor trailer positioning relative to the guide posts‚ ensuring smooth and damage-free coupling. Enhanced visibility boosts confidence and safety.
BMW X1 and Trailer Towing with Guide Posts
The BMW X1‚ a respected luxury crossover‚ boasts a towing capacity of up to 3‚700 pounds when properly equipped. Utilizing trailer guide posts with an X1 significantly simplifies hitching‚ especially for less experienced towers.
Selecting appropriate guide posts compatible with the X1’s hitch receiver is crucial for safe and efficient trailer connection‚ maximizing control and minimizing potential damage.
Towing Capacity and Guide Post Recommendations
Considering the BMW X1’s 3‚700-pound towing capacity‚ robust guide posts are recommended for optimal safety. For lighter trailers‚ adjustable posts offer versatility‚ while heavier loads benefit from fixed‚ high-strength steel options.
Ensure guide post compatibility with the X1’s hitch class – typically Class 1 or 2 – and prioritize models with enhanced visibility features for confident maneuvering during trailer connections.
Preferred Numbers and Series for Trailer Components

Standardization in trailer hitch and guide post design relies on preferred numbers and series‚ ensuring interchangeability and simplifying component selection. This approach‚ detailed in guides for preferred numbers‚ applies to critical parts like fifth wheel coupling pins.
Adhering to these standards promotes compatibility across manufacturers‚ streamlining maintenance and reducing the risk of mismatched components during trailer assembly or repair.
Standardization in Trailer Hitch and Guide Post Design
Implementing standardized designs for trailer hitches and guide posts is crucial for safety and ease of use. Preferred number series‚ as outlined in specialized documentation‚ dictate dimensions and specifications for components like coupling pins.
This standardization fosters interchangeability‚ simplifying repairs and ensuring compatibility between different trailer and vehicle combinations‚ ultimately enhancing the towing experience.
Purchasing Guide Posts: Where to Buy and Pricing
Acquiring trailer guide posts is readily achievable through specialized suppliers like Spicer Parts‚ offering a guarantee on all products. Online retailers and local trailer equipment stores also stock various options.
Pricing varies significantly based on material (steel‚ aluminum‚ polyethylene)‚ adjustability‚ and included features. Expect to find kits ranging from affordable basic models to more expensive‚ heavy-duty solutions.
Spicer Parts and Other Suppliers
Spicer Parts emerges as a prominent vendor‚ guaranteeing quality trailer hitch components‚ including guide posts‚ with delivery services across Russia. Beyond Spicer‚ numerous online and brick-and-mortar retailers cater to trailer needs.
These suppliers offer diverse options‚ from basic fixed posts to adjustable models‚ accommodating various trailer types and hitch receiver sizes. Comparing prices and features across suppliers is recommended for optimal value.