singer 500 manual

The Singer 500 manual is an essential guide for operating and maintaining your sewing machine. It provides detailed instructions, troubleshooting tips, and maintenance advice to ensure optimal performance. Download the free PDF to access comprehensive sewing machine operation guidelines and parts lists for seamless functionality.

1.1 Overview of the Singer 500 Sewing Machine

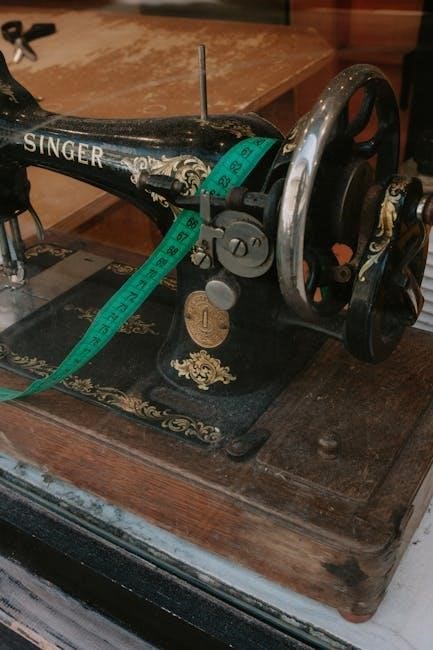
The Singer 500 sewing machine is a versatile and durable model designed for both beginner and experienced sewists. Available in variations like the Singer CG500 and HD500, it offers a range of stitching options and robust construction. Known for its portability and user-friendly interface, the Singer 500 is ideal for quilting, embroidery, and heavy-duty sewing. The machine supports various fabrics, including denim and canvas, making it a reliable choice for diverse projects. Its manual provides clear instructions for operation, maintenance, and troubleshooting, ensuring optimal performance and longevity. Download the free PDF manual for detailed guidance.

1.2 Importance of the Instruction Manual

The Singer 500 manual is crucial for understanding machine operations, troubleshooting, and maintenance. It provides step-by-step guides for setting up and using the sewing machine effectively. The manual ensures users can maximize the machine’s features, perform routine maintenance, and resolve common issues. By following the instructions, sewists can enhance productivity, maintain the machine’s longevity, and ensure safety. Accessing the PDF manual is essential for both beginners and experienced users to fully utilize the Singer 500’s capabilities. Download the manual for a seamless sewing experience.

Key Features of the Singer 500 Sewing Machine

The Singer 500 offers advanced features like automatic threading, 50+ stitch options, and compatibility with various fabrics. Its durability and versatility make it ideal for diverse sewing projects.

2.1 Technical Specifications

The Singer 500 sewing machine features a robust design with a heavy-duty metal frame, ensuring durability and stability during operation. It includes 50 built-in stitches, automatic needle threading, and adjustable stitch length and width. The machine operates at a maximum sewing speed of 1,000 stitches per minute, making it efficient for both delicate and heavy-duty fabrics. Weighing approximately 30 pounds, it combines portability with power, offering a versatile solution for various sewing tasks. Its compatibility with optional accessories enhances its functionality for specialized projects.

2;2 Unique Functionalities

The Singer 500 sewing machine offers multi-directional sewing capabilities, allowing for stitching in any direction, which is ideal for quilting and intricate patterns. It features an automatic needle threader, saving time and reducing eye strain. The machine also includes a one-touch buttonhole maker for precise and quick buttonhole creation. With variable stitch settings and customizable controls, it accommodates a wide range of fabrics and sewing techniques. These functionalities make the Singer 500 a versatile and user-friendly choice for both beginners and experienced sewists, enhancing creativity and efficiency in every project.

Singer 500 Manual Content Breakdown

The Singer 500 manual includes a detailed table of contents, step-by-step operation guides, and troubleshooting tips. It also covers maintenance and repair procedures, ensuring comprehensive understanding of the machine. Download the free PDF for full access to this essential documentation.

3.1 Table of Contents

The Singer 500 manual begins with a clear table of contents, organizing information into logical sections. This includes setup, operation, maintenance, and troubleshooting. Each chapter is detailed with sub-sections, such as technical specifications, custom stitch settings, and safety guidelines. The table of contents ensures users can quickly locate specific information, making the manual user-friendly. It also highlights key features and accessories, providing a roadmap for mastering the sewing machine. Download the PDF to explore the full structure and navigate effortlessly through the guide.

3.2 Detailed Instructions for Operation

The Singer 500 manual provides step-by-step operation instructions, ensuring users can master the machine’s features. From threading the needle to sewing various fabrics, the guide offers clear, actionable steps. It covers custom stitch settings, tension adjustment, and troubleshooting common issues. Detailed diagrams and illustrations enhance understanding, making it easier for both beginners and experienced sewists to achieve professional results. The manual also includes tips for optimizing performance and maintaining the machine. Download the PDF to access these comprehensive operational guidelines and unlock your sewing machine’s full potential.

3.3 Troubleshooting Guide

The Singer 500 manual includes a comprehensive troubleshooting guide to address common issues. It lists potential problems, such as thread breakage or uneven stitching, and provides clear solutions. The guide helps users identify causes of machine malfunctions and offers step-by-step repair instructions. Additionally, it covers error prevention and maintenance tips to ensure smooth operation. Download the PDF to access this invaluable resource and resolve issues quickly, keeping your sewing machine in optimal condition. This section is designed to help users maintain productivity and extend machine longevity.

How to Download the Singer 500 Manual

The Singer 500 manual is available for free download as a PDF from official Singer sources and trusted third-party websites like Superior Sewing Machine & Supply LLC.

4.1 Official Sources for the Manual

The Singer 500 manual can be downloaded directly from Singer’s official website, ensuring authenticity and reliability. Additionally, trusted retailers like Superior Sewing Machine & Supply LLC offer free PDF downloads. These sources provide the most accurate and up-to-date information, including operation guides, troubleshooting, and maintenance tips. Always prioritize official channels to avoid unauthorized versions that may lack critical details or contain errors.

4.2 Free PDF Download Options

Free PDF versions of the Singer 500 manual are available through trusted platforms like Superior Sewing Machine & Supply LLC and Singer’s official website. Sites such as Google Drive and Sewing Dude Blog also offer free downloads. These resources provide instant access to the manual without registration. Ensure downloads are from reliable sources to avoid unauthorized versions. Free PDFs include detailed guides, troubleshooting tips, and maintenance advice, making them indispensable for optimal machine performance and longevity.

4.3 Steps to Access the Manual Online

To access the Singer 500 manual online, visit Singer’s official website or trusted platforms like Superior Sewing Machine & Supply LLC. Navigate to the support or downloads section, search for the Singer 500 model, and select the appropriate manual. Download the PDF directly from these sources to ensure authenticity. Verify the source to avoid unauthorized versions. This process ensures quick and secure access to the manual, providing all necessary guidance for optimal machine use and maintenance.

Singer 500 Sewing Machine Maintenance

Regular maintenance ensures the Singer 500’s longevity. Clean the machine, oil moving parts, and check for wear. Proper care enhances performance and prevents mechanical issues.

5.1 Routine Cleaning and Lubrication

Regular cleaning and lubrication are crucial for maintaining the Singer 500’s performance. Remove dust and lint from the bobbin area and feed dogs using a soft brush. Apply a few drops of sewing machine oil to moving parts, such as the handwheel and tension discs, to ensure smooth operation. Refer to the manual for specific lubrication points. Cleaning and oiling should be done after every 50 hours of use to prevent friction and extend the machine’s lifespan. Always use high-quality sewing machine oil for best results.

5.2 Tips for Extending Machine Longevity

To extend the lifespan of your Singer 500, store it in a dry, clean environment and avoid exposure to dust. Use a machine cover when not in use to protect it from debris. Avoid using harsh chemicals for cleaning, as they may damage the finish. Regularly inspect and replace worn parts, such as needles and belts, to prevent further damage. For optimal performance, consider professional servicing every 12 months. Proper care and storage will ensure your Singer 500 remains reliable for years of sewing projects.

Singer 500 Service Manual

The Singer 500 service manual provides detailed repair guidelines, parts lists, and diagrams. It is available as a free PDF download, ensuring easy access for maintenance and repairs.

6.1 Service and Repair Guidelines

The Singer 500 service manual offers step-by-step repair guides, covering common issues like motor malfunctions and stitch errors. Detailed diagrams and troubleshooting checklists help users identify problems quickly. The manual emphasizes regular maintenance, such as lubrication and cleaning, to prevent wear and tear. Additionally, it provides instructions for replacing parts and adjusting mechanisms for optimal performance. This comprehensive resource ensures users can address most repairs independently, extending the machine’s lifespan and maintaining its efficiency. The guidelines are clear and concise, making it easy for both novice and experienced users to follow.

6.2 Parts List and Diagrams

The Singer 500 manual includes a detailed parts list and diagrams, enabling users to identify and replace components easily. The diagrams provide a visual breakdown of the machine’s internal and external parts, such as the motor, gears, and stitch regulators. This section is invaluable for repairs, as it helps users locate specific parts and understand their functions. The parts list is categorized for easy reference, ensuring that users can quickly find what they need. These resources are essential for maintaining and repairing the Singer 500 sewing machine effectively. The diagrams are clear and precise, making it easier for users of all skill levels to work on their machines confidently. All parts are labeled and described, ensuring accuracy in repairs and replacements; This comprehensive guide is a must-have for anyone looking to maintain or repair their Singer 500 sewing machine. The detailed illustrations and organized parts list make troubleshooting and repair tasks much more manageable. Whether you’re replacing a worn-out part or upgrading your machine, the Singer 500 parts list and diagrams provide everything you need. The manual also includes information on compatible parts and accessories, ensuring that users can find the right components for their specific model. This section is a testament to the Singer 500’s durability and longevity, as it empowers users to take control of their machine’s maintenance and repairs. The parts list and diagrams are available in the service manual, which can be downloaded as a PDF for easy access. By referring to these resources, users can extend the life of their Singer 500 and keep it running smoothly for years to come. The Singer 500 parts list and diagrams are a valuable resource for any sewing enthusiast or professional looking to maintain their machine in top condition. The manual’s clear and detailed approach ensures that users can handle repairs and maintenance with confidence. The Singer 500 parts list and diagrams are an essential tool for anyone who wants to keep their sewing machine in optimal working order. The manual’s comprehensive coverage of parts and their functions makes it an indispensable resource for both routine maintenance and complex repairs. The Singer 500 parts list and diagrams are designed to help users understand their machine better, enabling them to make necessary adjustments and repairs with ease. The manual’s detailed illustrations and organized layout ensure that users can quickly find the information they need. The Singer 500 parts list and diagrams are a key component of the manual, providing users with the knowledge and tools they need to maintain and repair their machine effectively. The manual’s focus on clarity and precision makes it an invaluable resource for anyone working with the Singer 500 sewing machine. The Singer 500 parts list and diagrams are a testament to the machine’s durability and the manufacturer’s commitment to providing users with the resources they need to keep their machine in top condition. The manual’s detailed approach ensures that users can handle repairs and maintenance with confidence, extending the life of their Singer 500 sewing machine. The Singer 500 parts list and diagrams are an essential resource for anyone looking to maintain or repair their machine. The manual’s clear and detailed approach ensures that users can handle repairs and maintenance with confidence, extending the life of their Singer 500 sewing machine. The Singer 500 parts list and diagrams are a valuable resource for any sewing enthusiast or professional looking to maintain their machine in top condition. The manual’s comprehensive coverage of parts and their functions makes it an indispensable resource for both routine maintenance and complex repairs. The Singer 500 parts list and diagrams are designed to help users understand their machine better, enabling them to make necessary adjustments and repairs with ease. The manual’s detailed illustrations and organized layout ensure that users can quickly find the information they need. The Singer 500 parts list and diagrams are a key component of the manual, providing users with the knowledge and tools they need to maintain and repair their machine effectively. The manual’s focus on clarity and precision makes it an invaluable resource for anyone working with the Singer 500 sewing machine. The Singer 500 parts list and diagrams are a testament to the machine’s durability and the manufacturer’s commitment to providing users with the resources they need to keep their machine in top condition. The manual’s detailed approach ensures that users can handle repairs and maintenance with confidence, extending the life of their Singer 500 sewing machine. The Singer 500 parts list and diagrams are an essential resource for anyone looking to maintain or repair their machine. The manual’s clear and detailed approach ensures that users can handle repairs and maintenance with confidence, extending the life of their Singer 500 sewing machine. The Singer 500 parts list and diagrams are a valuable resource for any sewing enthusiast or professional looking to maintain their machine in top condition. The manual’s comprehensive coverage of parts and their functions makes it an indispensable resource for both routine maintenance and complex repairs. The Singer 500 parts list and diagrams are designed to help users understand their machine better, enabling them to make necessary adjustments and repairs with ease. The manual’s detailed illustrations and organized layout ensure that users can quickly find the information they need. The Singer 500 parts list and diagrams are a key component of the manual, providing users with the knowledge and tools they need to maintain and repair their machine effectively. The manual’s focus on clarity and precision makes it an invaluable resource for anyone working with the Singer 500 sewing machine. The Singer 500 parts list and diagrams are a testament to the machine’s durability and the manufacturer’s commitment to providing users with the resources they need to keep their machine in top condition. The manual’s detailed approach ensures that users can handle repairs and maintenance with confidence, extending the life of their Singer 500 sewing machine. The Singer 500 parts list and diagrams are an essential resource for anyone looking to maintain or repair their machine. The manual’s clear and detailed approach ensures that users can handle repairs and maintenance with confidence, extending the life of their Singer 500 sewing machine. The Singer 500 parts list and diagrams are a valuable resource for any sewing enthusiast or professional looking to maintain their machine in top condition. The manual’s comprehensive coverage of parts and their functions makes it an indispensable resource for both routine maintenance and complex repairs. The Singer 500 parts list and diagrams are designed to help users understand their machine better, enabling them to make necessary adjustments and repairs with ease. The manual’s detailed illustrations and organized layout ensure that users can quickly find the information they need. The Singer 500 parts list and diagrams are a key component of the manual, providing users with the knowledge and tools they need to maintain and repair their machine effectively. The manual’s focus on clarity and precision makes it an invaluable resource for anyone working with the Singer 500 sewing machine. The Singer 500 parts list and diagrams are a testament to the machine’s durability and the manufacturer’s commitment to providing users with the resources they need to keep their machine in top condition. The manual’s detailed approach ensures that users can handle repairs and maintenance with confidence, extending the life of their Singer 500 sewing machine. The Singer 500 parts list and diagrams are an essential resource for anyone looking to maintain or repair their machine. The manual’s clear and detailed approach ensures that users can handle repairs and maintenance with confidence, extending the life of their Singer 500 sewing machine. The Singer 500 parts list and diagrams are a valuable resource for any sewing enthusiast or professional looking to maintain their machine in top condition. The manual’s comprehensive coverage of parts and their functions makes it an indispensable resource for both routine maintenance and complex repairs. The Singer 500 parts list and diagrams are designed to help users understand their machine better, enabling them to make necessary adjustments and repairs with ease. The manual’s detailed illustrations and organized layout ensure that users can quickly find the information they need. The Singer 500 parts list and diagrams are a key component of the manual, providing users with the knowledge and tools they need to maintain and repair their machine effectively. The manual’s focus on clarity and precision makes it an invaluable resource for anyone working with the Singer 500 sewing machine. The Singer 500 parts list and diagrams are a testament to the machine’s durability and the manufacturer’s commitment to providing users with the resources they need to keep their machine in top condition. The manual’s detailed approach ensures that users can handle repairs and maintenance with confidence, extending the life of their Singer 500 sewing machine. The Singer 500 parts list and diagrams are an essential resource for anyone looking to maintain or repair their machine. The manual’s clear and detailed approach ensures that users can handle repairs and maintenance with confidence, extending the life of their Singer 500 sewing machine. The Singer 500 parts list and diagrams are a valuable resource for any sewing enthusiast or professional looking to maintain their machine in top condition. The manual’s comprehensive coverage of parts and their functions makes it an indispensable resource for both routine maintenance and complex repairs. The Singer 500 parts list and diagrams are designed to help users understand their

Singer 500 Operation Guide

  • Provides step-by-step instructions for operating the Singer 500 sewing machine.
  • Covers basic functions, advanced techniques, and customizable stitch settings.
  • Includes guides for threading, fabric management, and troubleshooting common issues.
  • Available as a downloadable PDF for easy reference.

7.1 Step-by-Step Sewing Instructions

The Singer 500 manual provides a clear guide for operating the sewing machine, from basic setup to advanced stitching. Step-by-step instructions cover threading, bobbin preparation, and fabric alignment. Users can learn how to select stitches, adjust tension, and sew various fabrics. The guide also includes tips for backstitching, reversing, and securing seams. Detailed diagrams and illustrations help users understand each process. Whether you’re a beginner or experienced sewer, these instructions ensure smooth and efficient operation of the Singer 500 sewing machine. Customize your sewing experience with ease.

7.2 Customizing Stitch Settings

The Singer 500 manual offers detailed guidance on customizing stitch settings to suit various fabrics and projects. Users can adjust stitch length, stitch width, and even create custom stitch patterns. The manual explains how to use the machine’s controls to personalize settings, ensuring precise stitching for different materials. Additionally, it provides tips on saving favorite stitches and accessing pre-programmed settings. This feature enhances creativity and efficiency, allowing sewists to tailor their work seamlessly. Explore the full potential of your Singer 500 with these customizable stitch options.

Singer 500 Accessories and Compatibility

The Singer 500 supports a variety of accessories, including presser feet, needles, and attachments, to enhance sewing capabilities. These tools are designed for compatibility, ensuring optimal performance across projects.

8.1 Available Accessories

The Singer 500 offers a range of accessories to enhance your sewing experience. These include various presser feet for specialized stitching, such as zipper, buttonhole, and blind hem feet. Additional attachments like quilting guides and extension tables provide greater versatility. The machine is also compatible with Singer’s universal needles, ensuring optimal performance for different fabrics. Optional kits and storage cases are available to keep your accessories organized. These tools are designed to maximize the machine’s functionality and adapt to diverse sewing needs.

8.2 Compatible Models and Upgrades

The Singer 500 is compatible with several models, including the Singer 500a and 503, ensuring seamless integration. Upgrades like additional presser feet, specialized needles, and optional stitch cards expand its capabilities. The machine supports various Singer-compatible parts, such as the wiper bracket for adjustments. Users can also integrate accessories designed for the Singer 500 series, enhancing functionality. These upgrades and compatible models allow for customization, making the Singer 500 adaptable to diverse sewing projects and user preferences.

Singer 500 Safety Guidelines

Adhere to safety guidelines to prevent burns, electric shocks, or injuries. Avoid using the machine as a toy, keep children away, and handle hot parts cautiously.

9.1 Precautions for Safe Usage

Always prioritize safety when using the Singer 500 sewing machine. Avoid touching hot parts, and keep children away from the machine. Use the machine on a stable, flat surface and ensure good lighting. Never operate the machine near water or in humid conditions to prevent electric shocks. Avoid overloading the machine, as this can cause mechanical failure. Keep loose clothing and long hair tied back to prevent accidents. Regularly inspect the machine for damage and unplug it when not in use. Follow these guidelines to ensure safe and effective sewing experiences.

9.2 Emergency Procedures

In case of an emergency, immediately disconnect the power supply to prevent further damage or injury. If the machine overheats or emits unusual noises, stop operation and unplug it. For fabric jams, carefully switch off the machine and gently remove the fabric without forcing parts. In case of electrical issues, avoid touching metal components and contact a professional. Keep the machine out of reach of children and pets during emergencies. Always refer to the manual for specific guidance on handling unexpected situations safely and effectively.

Singer 500 Manual Additional Resources

Explore online communities and forums for troubleshooting and tips. Utilize video tutorials for visual guidance, ensuring optimal use of your Singer 500 sewing machine.

10.1 Online Communities and Forums

Engage with online communities and forums dedicated to sewing enthusiasts. These platforms offer valuable discussions, tips, and troubleshooting advice for the Singer 500. Users share experiences, repair guidance, and creative projects. Websites like Superior Sewing Machine & Supply LLC and Sewing Dude Blog host extensive resources. Participating in these forums can enhance your sewing skills and provide solutions to common issues. Active communities ensure access to updated information and peer support, making them indispensable for optimizing your Singer 500 manual usage.

10.2 Video Tutorials and Guides

Enhance your understanding of the Singer 500 with video tutorials and guides available online. Platforms like YouTube offer detailed demonstrations for setup, operation, and troubleshooting. These visual resources complement the manual, providing step-by-step instructions for various stitching techniques and machine maintenance. Tutorials often cover common issues, such as thread tension adjustment and bobbin installation. Additionally, some videos focus on advanced features like custom stitch settings. Watching these guides can help you master the Singer 500’s capabilities and resolve problems efficiently, ensuring optimal performance and creativity in your sewing projects.

bmw x3 manual

The BMW X3 Manual provides essential insights into understanding and maintaining your vehicle. It covers features, maintenance, and

Overview of the BMW X3

The BMW X3 is a luxury compact SUV known for its sleek design and advanced technology. It offers a balance of performance and comfort, with a range of engine options. The X3 features a spacious interior, intuitive infotainment systems, and robust safety features. Its handling and driving dynamics reflect BMW’s reputation for precision engineering. Whether for daily commuting or long trips, the X3 is a versatile choice for drivers seeking both style and functionality.

Importance of the Owner’s Manual

The BMW X3 Owner’s Manual is a comprehensive guide to understanding your vehicle’s features, operation, and maintenance. It provides detailed instructions for troubleshooting, safety guidelines, and optimal performance. Referencing the manual ensures proper usage of advanced technology, helps prevent potential issues, and prolongs the vehicle’s lifespan. It also includes essential information for warranty coverage and customization options. Regularly consulting the manual enhances driving experience and ownership satisfaction.

How to Navigate the Manual Effectively

The BMW X3 Manual is designed for easy navigation, with a clear structure and detailed indexing. Start with the table of contents to locate specific sections quickly. Use the index for keyword searches or refer to the troubleshooting guide for common issues. Digital versions offer search functionality, making it easier to find information fast. Regularly consult the manual to maximize your understanding of the vehicle’s features and maintenance requirements.

Key Features of the BMW X3

The BMW X3 boasts a sleek design, advanced infotainment systems, and robust performance options; It combines luxury, versatility, and cutting-edge technology, offering a premium driving experience.

Design and Technology Highlights

The BMW X3 features a sleek, aerodynamic design with a bold front grille and LED lighting. Inside, premium materials and an intuitive iDrive infotainment system enhance comfort and connectivity. Advanced driver-assistance technologies, such as adaptive cruise control and parking assist, elevate the driving experience. The vehicle also offers versatile cargo space and customizable interior options, blending practicality with luxury. Its modern design and innovative tech make it a standout in its class.

Performance and Engine Options

The BMW X3 offers a range of powerful engine options, including a 2.0L turbocharged inline-4 and a 3.0L twin-turbo inline-6. These engines deliver impressive horsepower and torque, ensuring a smooth and responsive driving experience. The xDrive all-wheel-drive system enhances traction and stability. With options for rear-wheel drive in select models, the X3 balances performance and efficiency, catering to diverse driving preferences and conditions. Its robust engineering ensures a dynamic and exhilarating ride.

Fuel Efficiency and Driving Dynamics

The BMW X3 combines impressive fuel efficiency with dynamic driving capabilities. With an estimated 33 mpg on a U.S. gallon, it offers a balance of power and economy. The xDrive all-wheel-drive system optimizes traction, enhancing stability and control. Responsive steering and precise handling deliver a sporty feel, while eco-friendly driving modes further improve efficiency. This blend of performance and practicality makes the X3 a versatile choice for both daily commuting and adventurous drives.

Maintenance and Troubleshooting

Regular maintenance ensures optimal performance and longevity of your BMW X3. Address common issues like parking brake malfunctions and engine concerns promptly. Refer to the manual for DIY fixes and diagnostic codes to resolve problems efficiently.

Regular Maintenance Schedule

The BMW X3 manual outlines a detailed maintenance schedule to ensure optimal performance. Services are recommended at specific intervals, typically every 5,000 to 15,000 miles; This includes oil changes, tire rotations, and filter replacements. Regular inspections of fluids, brakes, and belts are also crucial. Following the schedule helps prevent issues and maintains your vehicle’s reliability. Always consult the manual for tailored recommendations and use genuine BMW parts for the best results.

Common Issues and DIY Fixes

The BMW X3 manual highlights common issues like parking brake malfunctions and infotainment glitches. For the parking brake, check the manual release mechanism or reset the system. Infotainment issues often resolve with software updates or restarting the system. DIY fixes include consulting the manual for troubleshooting steps. Regular system checks and updates can prevent these issues. Always refer to the manual for detailed instructions and solutions to maintain your vehicle’s performance and functionality.

Understanding Diagnostic Codes

The BMW X3 manual explains how to interpret diagnostic codes, helping you identify issues quickly. These codes, often displayed through the iDrive system, provide specific fault details; Referencing the manual, you can understand code meanings and resolve problems. For example, codes related to the parking brake or infotainment system guide you to reset or update systems. Regularly checking and addressing these codes ensures optimal vehicle performance and prevents major repairs. Consult the manual for a comprehensive guide on diagnostic troubleshooting.

Safety Features and Reliability

The BMW X3 manual highlights advanced safety features like airbags and collision warnings, ensuring reliability. It also outlines emergency procedures, building trust in its performance and design.

Safety Ratings and Advanced Features

The BMW X3 manual emphasizes its top-tier safety ratings, featuring advanced systems like adaptive cruise control and lane departure warning. It also details emergency procedures, ensuring driver confidence. BMW’s commitment to safety is evident through its robust engineering and cutting-edge technology, making the X3 a reliable choice for secure driving experiences.

Reliability Studies and Owner Feedback

Reliability studies highlight the BMW X3’s consistent performance and durability. Owner feedback often praises its robust engineering and handling. However, some owners mention infotainment system glitches. Overall, the X3 is well-regarded for its reliability, with many owners appreciating its blend of luxury and practicality. Regular maintenance, as outlined in the manual, ensures optimal performance and longevity of the vehicle.

Emergency Procedures and Guidelines

The BMW X3 manual provides critical guidance for emergency situations. It details procedures for braking systems, stability control, and accident response. In case of a parking brake malfunction, owners are advised to secure the vehicle and consult the manual for manual release instructions. Regular checks of safety systems are recommended to ensure reliability. Always follow the outlined steps to maintain safety and control in unexpected situations.

Infotainment and Technology

The BMW X3 features an advanced iDrive system, offering intuitive controls for navigation, connectivity, and entertainment. The manual provides detailed guidance for troubleshooting and optimizing the infotainment experience.

Overview of the iDrive System

The iDrive system is BMW’s advanced infotainment platform, offering a seamless interface for navigation, media, and vehicle settings. With a high-resolution touchscreen and voice command functionality, it enhances connectivity and customization. The system integrates with smartphones and supports wireless updates, ensuring a modern driving experience. Drivers can access real-time traffic updates, climate controls, and entertainment options, making it a central hub for convenience and enjoyment behind the wheel.

How to Use Navigation and Connectivity

Access the navigation system via the iDrive controller or touchscreen. Enter destinations using voice commands or the keyboard. Enable real-time traffic updates for optimal routing. Connect your smartphone via Bluetooth or Wi-Fi for seamless integration. Use the BMW app to remotely lock, unlock, or locate your vehicle. Ensure your device is compatible with the latest software updates for enhanced functionality. Save favorite locations for quick access during future drives.

Troubleshooting Infotainment Issues

Common issues with the BMW X3 infotainment system include freezing, connectivity problems, and unresponsive touchscreens. Restart the system by turning the ignition off and on. Check all connections and ensure your smartphone is compatible. Update the iDrive software regularly for optimal performance. If problems persist, reset the system to factory settings or consult a professional technician for advanced diagnostics and repairs.

Customization and Accessories

Enhance your BMW X3 with interior and exterior customization options. Explore accessories like roof racks and styling elements. Upgrade with technology enhancements for a personalized driving experience.

Interior and Exterior Customization Options

The BMW X3 offers a range of interior customization options, including premium upholstery materials, trim finishes, and ambient lighting. Drivers can personalize their cabin with leather seats, contrast stitching, and technological upgrades like a panoramic sunroof.

Exterior customization options include paint finishes, alloy wheel designs, and styling packages. Enhance functionality with roof racks or tow bars, while styling elements like bumpers and side sills add a personal touch to your X3.

Recommended Accessories for the X3

Enhance your BMW X3 experience with practical accessories like roof racks for extra storage or cargo organizers for better trunk management. Add wireless charging pads and phone mounts for seamless connectivity on the go.

Consider styling accessories such as alloy wheels or exterior trim elements to personalize your vehicle. For tech enthusiasts, upgraded infotainment systems or premium sound systems are excellent choices. Always ensure accessories are BMW-approved for compatibility and performance.

Upgrading Your Vehicle’s Technology

Upgrade your BMW X3’s tech with wireless charging pads and advanced phone mounts for seamless connectivity. Consider enhancing the infotainment system to the latest iDrive version for improved navigation and app integration; Install a high-resolution rearview camera or upgrade to a premium sound system for an immersive audio experience. These upgrades ensure your X3 stays modern and tailored to your preferences.

Owner’s Manual Highlights

The BMW X3 Manual is a comprehensive guide offering detailed insights into vehicle features, maintenance, and troubleshooting. It also provides information on accessing the digital manual for convenience.

Understanding the Manual Structure

The BMW X3 Manual is organized into logical sections for easy navigation. It begins with an introduction, followed by detailed chapters on features, maintenance, and

Key Sections Every Owner Should Know

Essential sections of the BMW X3 Manual include the controls and instruments guide, which explains dashboard features and settings. The driving tips section offers advice for optimizing performance and fuel efficiency. Additionally, the safety features chapter details advanced systems like airbags and traction control. Regularly reviewing the maintenance schedule ensures the vehicle runs smoothly, while the

Downloading and Updating the Digital Manual

The BMW X3 Manual can be easily downloaded from the official BMW website or through the BMW ConnectedDrive portal. Regular updates ensure access to the latest features and

Accessories and After-Market Parts

Enhance your BMW X3 with practical accessories like roof racks or trunk organizers. Explore performance-enhancing parts such as sport exhausts or suspension upgrades. Discover technology upgrades like advanced infotainment systems or driver-assistance add-ons.

Practical Accessories for Daily Use

Enhance your BMW X3 ownership with practical accessories designed for daily convenience. Consider a trunk organizer for storage, cargo mats for protection, or a roof rack for extra luggage space. A rear seat drawer system offers additional storage, while all-weather floor mats protect against spills and dirt. A rear bike rack is perfect for outdoor enthusiasts, and seat covers ensure long-term interior preservation. These accessories are available through the BMW parts catalog or reputable aftermarket suppliers.

Performance-Enhancing After-Market Parts

Boost your BMW X3’s performance with after-market upgrades. A cold air intake or performance exhaust system can enhance engine power and responsiveness. Lighter alloy wheels improve handling, while suspension tuning kits refine ride quality; For turbocharged models, consider a tune box to maximize horsepower. These modifications can elevate your driving experience without compromising reliability, offering a balance of power and precision true to BMW’s heritage.

Technology and Convenience Upgrades

Enhance your BMW X3 experience with cutting-edge technology upgrades. Consider upgrading to a latest-gen iDrive system for smoother navigation and connectivity. Wireless charging pads and smartphone integration kits ensure seamless integration with your devices. Additionally, installing high-resolution dash cams or advanced parking sensors can improve safety and convenience. These upgrades not only modernize your vehicle but also elevate its functionality, keeping it aligned with modern driving demands and expectations.

Buyer’s Guide and Comparison

The BMW X3 stands out as a top choice for luxury SUVs, blending design, technology, and performance. Compare models to find the perfect fit for your needs and preferences.

Steps to Choose the Right BMW X3

Selecting the ideal BMW X3 involves evaluating your driving habits, budget, and features. Start by researching model years and comparing engine options. Consider fuel efficiency and technology upgrades. Test drive different trims to gauge comfort and handling. Finally, review warranty options and customization choices to make an informed decision.

Comparing Different Model Years

When comparing BMW X3 model years, focus on updates in design, technology, and performance. Newer models often feature enhanced fuel efficiency and advanced infotainment systems. For instance, the 2022 model introduced improved handling, while the 2025 version offers a hybrid option. Researching these differences helps identify the best fit for your needs and budget.

Questions to Ask Before Purchase

Before purchasing a BMW X3, consider its engine options, fuel efficiency, and technology features. Ask about maintenance costs, warranty coverage, and reliability. Inquire about customization options and accessories. Check safety ratings and advanced features. Test drive different models to compare handling and comfort. Ensure the vehicle aligns with your lifestyle and budget for a satisfying ownership experience.

Future of the BMW X3

The BMW X3 is expected to embrace electrification and hybrid options, alongside advanced technology and design innovations. Future models will likely focus on sustainability and enhanced performance.

Upcoming Features and Design Changes

The BMW X3 is set to introduce enhanced exterior styling, with a focus on aerodynamic efficiency and modern aesthetics. Interior updates will include advanced infotainment systems and premium materials.

Future models may incorporate autonomous driving technologies and sustainable energy solutions, aligning with BMW’s commitment to innovation and environmental responsibility.

Technological Advancements in Future Models

Future BMW X3 models will feature next-gen infotainment systems, enhanced autonomous driving capabilities, and advanced driver-assistance systems. Expect AI-integrated navigation and real-time connectivity upgrades. These innovations aim to enhance safety, improve efficiency, and deliver a seamless driving experience, aligning with BMW’s vision for future mobility.

Electrification and Hybrid Options

The BMW X3 is expected to embrace electrification with upcoming hybrid and fully electric models. These options aim to reduce emissions while maintaining performance. The current X3 xDrive30e offers a plug-in hybrid system, combining efficiency with electric-only driving modes. Future models may include longer electric ranges and advanced battery technologies, aligning with BMW’s sustainability goals and providing environmentally conscious choices for drivers.

Common Issues and Solutions

Common issues include parking brake malfunctions, engine concerns, and infotainment glitches. Solutions often involve checking the manual for troubleshooting steps and contacting BMW support if needed.

Parking Brake Malfunction Solutions

If your BMW X3 parking brake malfunctions, consult the manual for the manual release procedure. Ensure the brake is fully disengaged and check for error messages. If issues persist, refer to the troubleshooting section or contact BMW support for assistance. Regular maintenance can help prevent such problems. Always follow the manual’s guidelines for safe and effective solutions.

Addressing Common Engine Concerns

For common engine issues in your BMW X3, consult the manual for diagnostic codes and troubleshooting steps. Regular maintenance, such as oil changes and coolant checks, can prevent many problems. If error messages appear, refer to the manual’s guide for interpretation. Addressing concerns like timing chain issues or low coolant levels promptly ensures optimal performance and longevity of your vehicle.

Resolving Infotainment System Glitches

If your BMW X3’s infotainment system freezes or experiences connectivity issues, restart the system or check all connections. Refer to the manual for troubleshooting steps, such as resetting the iDrive system or updating software. Ensure all cables are securely connected and consult the manual’s guide for specific procedures to resolve glitches effectively and maintain seamless functionality.

Thank you for exploring the BMW X3 Manual. This guide has covered essential aspects to enhance your ownership experience. Refer to it for future maintenance and troubleshooting needs.

Final Thoughts on the BMW X3 Manual

The BMW X3 Manual is an invaluable resource, offering comprehensive guidance from maintenance to customization. Its structured approach ensures clarity and ease of use. Regular updates and digital access enhance its practicality. By following the manual, owners can optimize their vehicle’s performance and longevity, ensuring a seamless driving experience. It truly serves as a cornerstone for BMW X3 ownership.

Encouragement for Further Exploration

Exploring the BMW X3 Manual thoroughly empowers you to unlock your vehicle’s full potential. Discover hidden features, optimize performance, and enhance your driving experience. Regularly updating your knowledge with the latest digital manual ensures you stay informed about new technologies and improvements. Dive deeper into customization and maintenance tips to become a more confident and informed BMW X3 owner. Your journey with the X3 begins here—embrace it fully!

lord of the fallen trophy guide

This comprehensive guide helps unlock every trophy in Lords of the Fallen with expert strategies, tips, and insights. Tailored for all skill levels, ensuring efficient achievement collection.

1.1 Overview of the Game and Trophy System

Lords of the Fallen is an action fantasy RPG with a trophy system that rewards players for completing specific achievements. The game features Bronze, Silver, Gold, and Platinum trophies, with approximately 50 trophies in total. These range from defeating bosses to collecting hidden items like Beacons and Severed Hands. The trophy system is available on PS5, Xbox Series XS, and PC, offering a consistent experience across platforms. Players can earn trophies by mastering combat, exploring vast environments, and completing challenging tasks. The system encourages replayability, with some trophies requiring multiple playthroughs to unlock.

1.2 Importance of Trophies for Game Completion

Trophies in Lords of the Fallen are essential for achieving 100% game completion and unlocking the Platinum Trophy. They reward players for overcoming challenges, such as defeating bosses, collecting hidden items like Beacons and Severed Hands, and mastering specific in-game mechanics. Earning trophies encourages exploration, combat mastery, and completion of optional content. Many trophies also promote replayability, as some achievements require multiple playthroughs or co-op participation. By pursuing trophies, players gain a deeper understanding of the game’s world and mechanics, making the journey to Platinum both rewarding and fulfilling. Trophies serve as a roadmap to experiencing everything the game offers.

1.3 Brief History of the Game and Its Popularity

Lords of the Fallen is an action fantasy RPG developed by Hexworks, released in 2023. It gained popularity for its engaging combat and immersive storytelling, appealing to fans of the Soulslike genre. The game’s unique features, such as the use of Beacons and co-op mechanics, set it apart. Its challenging gameplay and rewarding trophy system attracted a dedicated community, with players actively sharing guides and strategies online. The game’s popularity surged due to its rich world design and the satisfaction of overcoming its difficult achievements, making it a standout title in its category.

Full List of Trophies and Achievements

The game features a diverse range of trophies, including Bronze, Silver, Gold, and Platinum, each with unique requirements. Explore the full list to track your progress and unlock all achievements across platforms.

2.1 Bronze Trophies

Bronze trophies in Lords of the Fallen are the most common achievements, often tied to specific actions or milestones. Examples include defeating early bosses like the Unbroken Promise or the Hollow Crow. These trophies provide a foundation for progression and are typically unlocked through natural gameplay. Some bronze trophies involve collecting items, such as Severed Hands, or completing co-op challenges. Strategies for earning these often focus on mastering basic combat skills and exploring the game’s world. Tips include leveraging co-op mode for easier boss defeats and ensuring thorough exploration to uncover hidden items and secrets.

2.2 Silver Trophies

Silver trophies in Lords of the Fallen represent moderate challenges, such as defeating specific bosses or completing key tasks. Examples include “Wings of Grief” for defeating the Hollow Crow and “Unbroken to the End” for defeating the Unbroken Promise. These trophies often require strategic gameplay and a solid understanding of combat mechanics. Some silver trophies involve co-op play, like avenging a fallen lampbearer or defeating a boss with a partner. Earning these trophies demands skill and persistence, making them a stepping stone toward the platinum trophy. Specific strategies and optimal character builds are essential for unlocking these achievements efficiently.

2.3 Gold Trophies

Gold trophies in Lords of the Fallen are reserved for significant achievements, such as defeating challenging bosses or completing complex sections. Examples include “Defeating the Unbroken Promise” and “Overcoming the Hollow Crow.” These trophies require mastery of the game’s mechanics and often demand precise strategies. Some gold trophies may involve co-op or PvP elements, such as defeating another player in PvP or avenging a fallen lampbearer. Earning these trophies showcases a player’s advanced skills and dedication, serving as a major milestone on the path to the platinum trophy. Each gold trophy brings players closer to 100% completion and the ultimate achievement.

2.4 Platinum Trophy

Obtaining the Platinum Trophy in Lords of the Fallen is the ultimate achievement, requiring completion of all base game trophies. This prestigious award demands dedication and skill, as players must defeat every boss, collect all Beacons and Severed Hands, and earn every achievement. A minimum of three playthroughs is typically necessary to unlock all trophies, with careful planning to avoid missing any. The Platinum Trophy is a testament to mastery of the game, showcasing a player’s ability to overcome its challenges and unlock every hidden secret. Earning it requires time, strategy, and perseverance, but the satisfaction is unmatched.

2.5 Platform-Specific Trophies (PS5, Xbox Series XS, PC)

The trophy system in Lords of the Fallen is consistent across PS5, Xbox Series XS, and PC, with no platform-exclusive trophies. However, each platform offers unique features that may enhance trophy hunting. For example, the PS5 version supports auto-popping trophies, while Xbox and PC players can utilize cross-platform saves for easier achievement tracking. Despite these differences, the trophy requirements remain identical, ensuring a fair experience for all players. This uniformity allows trophy hunters to choose their preferred platform without worrying about missing out on specific achievements, making the journey to Platinum equally rewarding across all systems.

Roadmap to Platinum Trophy

Achieving the Platinum Trophy requires strategic planning and efficiency. Follow a clear roadmap, focusing on key achievements during multiple playthroughs to unlock all trophies successfully.

3.1 Minimum Number of Playthroughs Required

Completing Lords of the Fallen and unlocking the Platinum Trophy requires a minimum of three playthroughs. The first playthrough focuses on the main story and initial achievements. The second allows players to collect missed trophies and optimize their build. The third playthrough, often in New Game Plus (NG+), ensures all remaining achievements are unlocked. Strategic planning is essential to minimize time spent across multiple playthroughs. Utilizing guides and efficient routing can help streamline the process and ensure all trophies are earned without unnecessary repetition.

3.2 Step-by-Step Guide to Achieving Platinum

To achieve the Platinum Trophy in Lords of the Fallen, follow a structured approach. Begin by completing the main story, unlocking essential trophies like early achievements and boss victories. In your first playthrough, focus on story-related trophies and basic collectibles. Your second playthrough should target missed trophies, such as co-op and PvP requirements. Finally, use New Game Plus (NG+) to clean up remaining achievements, leveraging carried-over items and experience. Use detailed guides to optimize your route and ensure no trophy is overlooked. Strategic planning and efficient progression are key to securing the Platinum efficiently.

3.3 Tips for Completing Trophies in the Least Time

Maximizing efficiency is key to unlocking trophies quickly in Lords of the Fallen. Focus on story-related trophies first, as they unlock naturally during progression. Use co-op mode to tackle challenging boss fights and specific achievements, saving time and effort. Prioritize collecting 20,000 XP before boss encounters to earn the related trophy. Avoid unnecessary exploration until later playthroughs, and concentrate on essential collectibles like Beacons and Severed Hands. Plan your stat upgrades strategically to optimize your build for trophy requirements. By following these tips, you can streamline your trophy hunt and achieve 100% completion efficiently.

Tips and Tricks for Earning Trophies

Mastering key strategies, leveraging co-op mode, and efficiently managing XP before boss fights are essential for swift trophy completion in Lords of the Fallen.

4.1 Collecting 20,000 Experience Points Before Boss Fights

To unlock this trophy, accumulate 20,000 XP before engaging in a boss fight without spending any. This requires strategic exploration and enemy defeats. Farm in areas with high enemy respawn rates to quickly gather XP. Avoid allocating points until after the boss battle to ensure eligibility. This tactic not only aids in trophy completion but also boosts your character’s stats for subsequent playthroughs, making it a valuable early-game strategy.

4.2 Strategies for Defeating Bosses

Defeating bosses in Lords of the Fallen requires mastery of their attack patterns and precise timing. Learn each boss’s moveset to anticipate and dodge effectively. Stay mobile, use shields wisely, and exploit openings after their attacks. Co-op play can ease difficulty, as a partner can distract the boss while you strike. Ensure your character is well-equipped and upgraded, focusing on stats like strength for melee or agility for faster dodges. Exploit elemental weaknesses using appropriate gear. Finally, stay patient and persistent, as boss battles are challenging but rewardingly surmountable with practice and strategy.

4;3 Utilizing Co-op Mode for Specific Trophies

Co-op mode in Lords of the Fallen is a powerful tool for unlocking specific trophies. Team up with a partner to defeat bosses, avenge fallen lampbearers, or conquer challenging encounters together; Summoning a co-op partner can simplify tough battles and help earn trophies like “Defeat a boss alongside a co-op partner.” Coordination and communication are key to success. Additionally, co-op can accelerate progress toward trophies requiring multiple playthroughs or specific in-game actions. Utilize this feature strategically to streamline your trophy hunt and make the experience more enjoyable and efficient. Co-op is a vital component of a platinum completion strategy.

Collectibles and Hidden Items

Lords of the Fallen is filled with hidden collectibles like Beacons, Severed Hands, and Spirits. These items unlock trophies, enhance abilities, and reveal the game’s lore. Discovering them is crucial for 100% completion and achieving specific achievements. Use exploration and strategic searching to locate these hidden treasures scattered across the world. They play a vital role in both gameplay and trophy progression, making them essential for dedicated players aiming to unlock everything the game offers. Each collectible category has unique requirements and rewards, adding depth to the adventure.

5.1 Beacons: Locations and Purposes

Beacons are ancient artifacts scattered across the world of Lords of the Fallen. These unique items serve as key collectibles, requiring players to locate and cleanse them. Each Beacon is hidden in specific areas, often in hard-to-reach locations, making exploration essential. Cleansing a Beacon unlocks rewards, enhances abilities, and contributes to trophy progression. Their primary purpose is tied to the game’s lore and gameplay mechanics. Finding all Beacons is vital for 100% completion, as they are linked to specific achievements. Use thorough exploration and attention to detail to discover these hidden treasures and unlock their full potential in your journey.

5.2 Severed Hands: How to Donate and Unlock Trophies

Severed Hands are a unique collectible in Lords of the Fallen, serving as offerings to specific altars. To unlock trophies, players must donate a total of 10 Severed Hands, each found in various locations throughout the game. These items are often hidden in challenging areas, requiring thorough exploration. Donating them progresses certain achievements and enhances gameplay by unlocking special rewards. Ensure to collect and donate all Severed Hands to achieve 100% completion and earn associated trophies. This mechanic adds depth to the game’s collectible system and rewards meticulous players.

5.3 Spirits and Their Role in Trophy Completion

Spirits in Lords of the Fallen are mysterious entities tied to the game’s lore and trophy system. By interacting with them using the lamp, players uncover hidden dialogue and insights. Certain trophies require encountering a specific number of spirits, adding depth to exploration. These interactions often provide clues about the world and its history. Completing spirit-related tasks contributes to 100% achievement, making them a crucial part of the game’s completion challenges. Understanding their role enhances both gameplay and trophy progression, encouraging players to engage fully with the environment and its enigmatic inhabitants. Spirits are a unique feature that enriches the overall experience.

Co-op and PvP Trophies

Co-op and PvP trophies in Lords of the Fallen offer unique challenges, with co-op enabling teamwork achievements and PvP introducing competitive combat for skilled players seeking glory.

6.1 Defeating Bosses with a Co-op Partner

Defeating bosses in co-op mode requires seamless teamwork and communication. Players can tackle challenging encounters together, sharing the workload and strategizing to exploit enemy weaknesses. Co-op partners can revive each other, making difficult fights more manageable. To earn specific trophies, ensure both players contribute equally to the boss’s defeat. Team coordination is key to overcoming the toughest foes, and the shared experience enhances the game’s replayability. This collaborative approach not only simplifies boss battles but also fosters camaraderie among players striving for platinum completion.

6.2 Avenge a Fallen Lampbearer

Avenge a Fallen Lampbearer is a unique trophy that requires players to respond to the deaths of other players’ lampbearers. When a lampbearer is defeated in co-op, avenge their death by defeating the same boss that killed them. This trophy encourages interaction within the co-op community, as it relies on multiplayer dynamics. Timing and strategy are crucial, as avenging a lampbearer must be done before leaving the area. Successfully completing this challenge not only grants the trophy but also strengthens the bond between co-op partners striving for platinum completion. This trophy adds a layer of interconnectedness to the game’s multiplayer experience.

6.3 Defeating Another Player in PvP

Defeating another player in PvP is a challenging silver trophy that requires skill and strategy. Engage in invasive multiplayer combat by invading another player’s world or defending your own. To earn this trophy, defeat a player in a PvP encounter, showcasing your mastery of the game’s combat mechanics. Practice timing, parrying, and exploiting enemy weaknesses. This trophy highlights the game’s competitive aspect and rewards players for their proficiency in player-versus-player battles. Mastering PvP is essential for unlocking this achievement and enhancing your overall gameplay experience in Lords of the Fallen.

Stats and Character Upgrades

Optimizing stats like Strength, Agility, and Vitality is crucial for enhancing melee combat and character survivability. Strategic upgrades ensure a well-rounded build, boosting overall performance in the game.

7.1 Importance of Strength Stat for Melee Classes

Strength is a crucial stat for melee-focused characters in Lords of the Fallen, directly enhancing raw attack power. Allocating points to Strength improves weapon efficiency, enabling players to deal significant damage. For classes relying on swords, axes, or hammers, maximizing Strength is essential for overcoming challenging enemies and bosses. While other stats like Agility and Vitality are important, Strength remains the primary focus for melee builds. Balancing Strength with other attributes ensures a well-rounded character, capable of both dealing heavy blows and withstanding intense combat scenarios.

7.2 Leveling Up and Optimizing Your Build

Leveling up in Lords of the Fallen requires strategic allocation of points to stats like Strength, Agility, and Vitality. Prioritize Strength for melee builds to maximize attack power and weapon efficiency. Agility enhances mobility and dodge rolls, while Vitality boosts health and stamina. Experiment with different builds to suit your playstyle, ensuring a balance between offense and defense. Upgrading weapons and gear is equally crucial, as it enhances damage output and survivability. Regularly assess your build to adapt to increasing difficulty, ensuring optimal performance in both exploration and combat scenarios.

Boss Fights and Challenges

Mastering boss fights in Lords of the Fallen demands skill and strategy. Learn enemy patterns, exploit weaknesses, and prepare thoroughly with optimal gear and upgrades for success.

8.1 Key Boss Fights and Their Trophy Requirements

Defeating key bosses in Lords of the Fallen is essential for unlocking trophies. Each boss, like the Unbroken Promise and Hollow Crow, has specific requirements. For instance, defeating the Unbroken Promise earns the Unbroken to the End trophy, while conquering the Hollow Crow grants Wings of Grief. Strategies involve mastering enemy patterns, exploiting weaknesses, and equipping optimal gear. Some trophies demand specific actions, like defeating bosses without taking damage or using co-op partners. These challenges test skill and preparation, making each victory rewarding and progression toward the platinum trophy meaningful.

8.2 Strategies for Difficult Encounters

Mastering challenging encounters in Lords of the Fallen requires precision and strategy. Exploit enemy weaknesses, such as stagger mechanics, to create openings for attacks. Utilize the environment to your advantage, luring foes into traps or narrow spaces. Optimize your gear and stats, ensuring your build suits the battle ahead. Stay patient, as aggressive play often leads to unnecessary deaths. Use potions wisely and leverage co-op partners for shared burden. Dodging and parrying are critical, especially against formidable bosses. With practice and adaptability, even the toughest foes can be overcome, paving the way to trophy success and a smoother platinum journey.

Game Completion and 100% Achievement

Achieving 100% completion requires mastering all challenges, defeating every boss, and collecting every Beacon, Severed Hand, and Spirit. Efficiency is key to unlocking all trophies seamlessly.

9.1 All-in-One Collectibles Guide

Discover the locations of all collectibles, including Beacons, Severed Hands, and Spirits, essential for 100% completion. Beacons, ancient artifacts, must be cleansed to unlock rewards. Severed Hands, donated to altars, grant unique bonuses. Spirits, mysterious companions, enhance abilities. Explore every area thoroughly, as these items are hidden in challenging-to-reach spots. Use this guide to pinpoint each collectible, ensuring no item is missed. Completing your collection unlocks exclusive trophies and enhances your gameplay experience, making it a crucial step toward achieving the platinum trophy.

9.2 Categorized List of Achievements/Trophies

Explore a detailed breakdown of all achievements and trophies in Lords of the Fallen, categorized for easy tracking. Story-related trophies like Unbroken to the End and Wings of Grief highlight key narrative milestones. Combat-focused achievements, such as defeating bosses with co-op partners or in PvP, showcase gameplay mastery. Exploration trophies reward discovering hidden items like Beacons and Severed Hands. Collectibles-based achievements ensure completionists leave no stone unturned. Each trophy is listed with its type, rarity, and brief description, helping players prioritize their journey to 100% completion and the coveted platinum trophy.

Up-to-Date Trophy Guides and Resources

Stay updated with the latest trophy guides and resources for Lords of the Fallen. Online platforms offer comprehensive walkthroughs, video guides, and community forums to aid players in achieving 100% completion and the platinum trophy efficiently.

10.1 Latest Achievements with Modifiers

The latest achievements in Lords of the Fallen introduce challenging modifiers that test players’ skills. These include defeating bosses alongside co-op partners, avenging fallen lampbearers, and triumphing in PvP battles. To unlock these, players must collect specific items like Severed Hands and strategically use Beacons. Guides now offer detailed strategies for these modified achievements, ensuring efficient completion. Stay updated with the latest walkthroughs and community tips to conquer these new challenges and earn every trophy seamlessly.

10.2 Recommended Guides for Platinum Completion

For achieving the platinum trophy in Lords of the Fallen, comprehensive guides are essential. These resources provide step-by-step instructions, optimal routes, and expert tips for completing all achievements. Many guides recommend a minimum of three playthroughs to unlock every trophy. They also highlight strategies for co-op and PvP challenges, such as defeating bosses with a partner or avenging a fallen lampbearer. Additionally, these guides emphasize the importance of collectibles like Beacons and Severed Hands. By following these detailed walkthroughs, players can efficiently navigate the game and optimize their progress toward 100% completion.

Platforms and Compatibility

Lords of the Fallen is available on PlayStation 5, Xbox Series X/S, and PC, with full trophy support across all platforms. Trophy progression is unified, allowing seamless sharing between platforms for optimal completion.

11.1 Trophy Support on PS5, Xbox Series XS, and PC

Lords of the Fallen offers full trophy support on PlayStation 5, Xbox Series X/S, and PC. Trophies are synchronized across all platforms, allowing players to earn achievements seamlessly. The game features platform-specific optimizations, ensuring a smooth experience on each system. Trophy lists are identical across platforms, with no exclusive achievements, making it easier for players to pursue 100% completion regardless of their preferred platform. Cross-platform progression is supported, enabling players to continue their journey on different devices without losing progress. This uniformity enhances the overall trophy hunting experience, catering to a diverse gaming community.

This guide provides a clear path to unlocking all Lords of the Fallen trophies. Start by collecting 20,000 XP before boss fights and stay persistent—platinum awaits!

12.1 Summary of Key Points

This guide outlines the essential strategies for earning all Lords of the Fallen trophies, including collectibles, co-op tactics, and boss fight tips. Prioritize collecting 20,000 XP before boss encounters and utilize co-op mode for specific achievements. Efficiently manage your playthroughs, focusing on stat optimization and build customization. Don’t overlook hidden items like Beacons and Severed Hands, as they unlock crucial trophies. With persistence and careful planning, achieving the Platinum trophy is attainable. Stay organized, leverage online resources, and embrace the challenge to fully complete the game.

12.2 Encouragement for Players to Pursue Trophies

Embark on this rewarding journey to unlock every trophy in Lords of the Fallen! Earning trophies enhances your gaming experience, offering a sense of accomplishment and showcasing your mastery. Each achievement, no matter how challenging, brings you closer to the coveted Platinum trophy. With dedication and the right strategies, even the toughest milestones are within reach. The satisfaction of 100% completion is unparalleled, making every effort worthwhile. Join the community, share tips, and embrace the grind—your perseverance will be rewarded with unforgettable gaming memories and the pride of conquering this epic adventure.

bistpower fan installation instructions

Bitspower fans are high-performance cooling solutions designed to enhance computer system efficiency and thermal management. Proper installation ensures optimal airflow‚ reducing temperatures and improving overall system reliability.

1.1 Overview of Bitspower Fans

Bitspower fans are high-quality cooling solutions designed for optimal performance and reliability in computer systems. Available in various models like the Griffin 120‚ Notos 120‚ and NJORD 120‚ these fans offer advanced features such as high airflow rates‚ PWM control for adjustable speeds‚ and customizable RGB lighting. Engineered for silent operation and durability‚ Bitspower fans are ideal for both entry-level and high-performance systems. Their sleek designs and robust construction ensure efficient cooling‚ making them a popular choice among PC enthusiasts and builders. Whether for case ventilation or radiator cooling‚ Bitspower fans deliver consistent performance and long-lasting reliability‚ enhancing overall system efficiency and user satisfaction.

1.2 Importance of Proper Installation

Proper installation of Bitspower fans is essential to ensure optimal performance‚ reliability‚ and longevity. Incorrect installation can lead to reduced airflow‚ increased noise levels‚ and potential damage to the fan or other system components. By following the manufacturer’s instructions‚ users can avoid common mistakes‚ such as improper mounting or loose connections‚ which may result in malfunction or premature wear. Correct installation ensures that the fan operates within its design specifications‚ providing efficient cooling and maintaining system stability. Additionally‚ proper installation enhances aesthetics and cable management‚ contributing to a cleaner and more organized build. This step is crucial for maximizing the benefits of Bitspower fans and ensuring a seamless user experience.

Preparing for Installation

Begin by unpacking and inspecting the Bitspower fan for any damage. Plan the installation location‚ ensuring optimal airflow and accessibility. Gather all necessary tools and materials beforehand.

2.1 Unpacking and Inspecting the Fan

Start by carefully unpacking the Bitspower fan from its packaging to avoid damage. Inspect the fan blades‚ cables‚ and connectors for any visible defects or damage. Ensure all components‚ such as screws‚ adapters‚ and manuals‚ are included. Check the fan’s technical specifications‚ including airflow‚ voltage‚ and RGB features‚ to confirm they match your system requirements. Verify the fan’s dimensions (e.g.‚ 120x120x25mm) to ensure compatibility with your case. Familiarize yourself with the provided accessories‚ such as the fan-adaptor for performance or silence modes. If any damage or missing items are found‚ contact Bitspower support immediately. This step ensures a smooth installation process.

2.2 Tools and Materials Needed

To install your Bitspower fan‚ you’ll need a few essential tools and materials. Start with a screwdriver (preferably Phillips-head) for mounting the fan to your case. Ensure you have the screws provided with the fan or compatible alternatives. Cable ties or clips will help manage wires neatly. If your fan includes RGB or PWM features‚ you may need additional connectors or hubs. A power source‚ such as a motherboard fan header or a separate power supply‚ is required. Finally‚ refer to the installation manual provided with your Bitspower fan for specific instructions tailored to your model. Having these tools ready ensures a smooth and efficient installation process.

2.3 Choosing the Optimal Location for Installation

Selecting the right location for your Bitspower fan is crucial for maximizing cooling efficiency and maintaining a balanced airflow within your system. Common installation spots include the front‚ top‚ or rear of the case‚ depending on your setup. Front-mounted fans are ideal for intake‚ bringing cool air into the system‚ while top or rear fans often serve as exhaust‚ expelling heated air. Consider the airflow path‚ cable management‚ and aesthetic preferences when deciding. Ensure the fan is positioned to avoid obstruction and aligns with your case’s venting design. Proper placement ensures optimal cooling performance and minimizes noise. Always check your case’s compatibility with the fan size and type before finalizing the location.

Understanding Fan Specifications

Bitspower fans feature advanced specifications like high airflow (up to 78.15 CFM)‚ low noise‚ and PWM control for precise speed adjustment‚ ensuring optimal cooling and system stability.

3.1 Key Features of Bitspower Fans

Bitspower fans are renowned for their high-quality design and performance. They feature advanced RGB lighting‚ PWM control for precise speed adjustment‚ and high airflow rates‚ ensuring efficient cooling. The Griffin 120 model‚ for example‚ delivers up to 78.15 CFM of airflow and operates quietly. These fans are built with durable materials and include features like rubber damping pads to reduce vibration. The IP67 waterproof rating adds reliability in demanding environments. With a sleek and modern design‚ Bitspower fans are compatible with various PC cases and radiators‚ making them versatile for different setups. They also come with optional RGB lighting for customizable aesthetics. These features make Bitspower fans a top choice for both performance and style.

3.2 Technical Specifications (Airflow‚ Voltage‚ etc.)

Bitspower fans boast impressive technical specifications tailored for high performance. The Griffin 120 model‚ for instance‚ offers maximum airflow of 78.15 CFM and 132.78 CMH‚ ensuring efficient cooling. Operating at a rated voltage of 12V DC‚ these fans are compatible with most PC power supplies. They feature a wide PWM speed range‚ typically between 500 to 1800 RPM‚ allowing for adjustable noise levels and cooling needs. The fans are designed with a 120x120x25mm frame size‚ fitting standard mounting slots. With a power consumption of 1.2W‚ they are energy-efficient and reliable. These specifications ensure optimal cooling‚ minimal noise‚ and long-term durability‚ making Bitspower fans a reliable choice for enthusiasts and builders seeking superior thermal management solutions.

Step-by-Step Installation Guide

Unpack and inspect the fan for damage. 2. Mount the fan to the case using screws. 3. Connect the power cable to the motherboard or hub. 4. Configure RGB and PWM settings if applicable. Ensure secure connections for proper airflow and reliable performance.

4.1 Mounting the Fan to the Case

Mounting the Bitspower fan to your computer case is a straightforward process. Begin by identifying the appropriate mounting points on your case‚ typically located at the front‚ top‚ or rear. Use the provided screws and ensure they align with the fan’s built-in mounting holes. Gently place the fan into position‚ ensuring it is evenly spaced and aligned properly. Secure the fan using the screws‚ tightening them firmly but avoiding over-tightening‚ which could damage the fan or case. For optimal airflow‚ consider the fan’s rotation direction‚ often indicated by arrows on the housing. Proper mounting ensures minimal vibration and maximizes cooling efficiency. Double-check the fan’s stability before proceeding to the next steps.

4.2 Connecting the Power Cable

Once the fan is mounted‚ connect the power cable to a suitable power source. Identify the fan’s power connector‚ typically a 4-pin PWM or 3-pin DC connector. Connect it to the motherboard’s fan header‚ a fan hub‚ or directly to the power supply unit (PSU) using an adapter if necessary. Ensure the connection is secure to prevent power issues. For fans with RGB or PWM features‚ additional connectors may need to be linked to the motherboard or a dedicated controller. Double-check the connections for tightness and proper alignment to avoid electrical issues. This step ensures the fan operates correctly and efficiently‚ providing reliable cooling performance for your system.

4.3 Installing Additional Features (RGB‚ PWM)

After mounting and connecting the fan‚ install any additional features like RGB lighting or PWM control. For RGB‚ connect the designated cable to a 5V 3-pin header on the motherboard or a dedicated RGB controller. Ensure compatibility with your system’s lighting software. For PWM functionality‚ link the fan’s PWM connector to a 4-pin header on the motherboard to enable speed control. Use fan control software to customize settings‚ such as lighting effects or speed profiles. Verify all connections are secure and test the features to ensure proper operation. Refer to the fan’s manual for specific instructions tailored to your model and system configuration. Proper installation of these features enhances both aesthetics and performance.

Configuring Fan Settings

Use fan control software to adjust speed‚ lighting‚ and other settings. Configure RGB effects and synchronize colors for a personalized look. Set custom fan curves for optimal performance.

5.1 Using Fan Control Software

Fan control software allows users to customize fan settings for optimal performance and noise levels. Install and launch the software‚ then connect your Bitspower fan to the system. Use the interface to adjust RPM settings‚ creating custom fan curves based on temperature readings. Enable features like PWM control for dynamic speed adjustments. Configure RGB lighting settings to match your system’s aesthetic. Utilize monitoring tools to track fan performance and system temperatures in real-time. Save profiles for different usage scenarios‚ such as gaming or idle modes. Ensure software updates are installed for the latest features and compatibility. This step ensures your Bitspower fan operates efficiently and silently‚ tailored to your specific needs.

5.2 Adjusting Speed and Lighting Settings

Adjusting fan speed and lighting settings enhances customization and system performance. Use PWM control to set fan speeds based on temperature or performance needs. Access lighting settings through software or hardware controls to customize RGB effects. Select from predefined modes or create unique lighting profiles. Synchronize lighting with other components for a cohesive aesthetic. Adjust brightness and color schemes to match your system’s theme. Fine-tune fan curves to balance noise and cooling efficiency. Ensure lighting settings are saved for consistent operation. These adjustments optimize both performance and visual appeal‚ allowing you to tailor your setup to specific preferences or operational demands.

Troubleshooting Common Issues

Identify and resolve common issues like fan malfunction or connectivity problems by checking power connections and consulting the manual for specific troubleshooting steps and solutions.

6.1 Diagnosing Fan Malfunction

Start by visually inspecting the fan for damage or dust buildup‚ which can hinder performance. Check for unusual noises or vibrations‚ as these may indicate improper installation or worn-out bearings. Verify that all power and RGB connectors are securely attached to the motherboard or fan hub. If the fan does not spin‚ ensure the power cable is connected correctly and the motherboard or controller is functioning properly. For PWM or RGB fans‚ use software tools to test fan control signals. If issues persist‚ consult the user manual for troubleshooting specific to your Bitspower fan model. Diagnosing early helps prevent further damage or system instability.

6.2 Resolving Connection Problems

If the fan fails to connect‚ first check the power and data cables for damage or misalignment. Ensure all connectors are securely plugged into the correct ports on the motherboard or fan hub. For RGB fans‚ verify that the DRGB header is connected to a compatible 5V 3-pin header. If using a PWM fan‚ confirm the 4-pin header is properly seated. Restart your system to ensure all connections are recognized. If issues persist‚ try swapping cables or ports to isolate the problem. Refer to the user manual for specific pin configurations and compatibility. Resolving connection issues promptly ensures optimal fan performance and system stability. Always follow proper installation guidelines to avoid damage to components.

Maintenance and Upkeep

Regularly clean the fan blades and housing to prevent dust buildup‚ ensuring optimal airflow and performance. Avoid harsh chemicals and ensure connections remain secure for longevity.

7.1 Cleaning the Fan for Optimal Performance

To maintain peak performance‚ regularly clean your Bitspower fan by turning off the power and gently removing dust with compressed air. Avoid harsh chemicals‚ as they may damage the fan or its finish. For stubborn dirt‚ use a soft cloth lightly dampened with water‚ but ensure no moisture enters internal components. Inspect and clean the fan blades‚ housing‚ and connectors to prevent dust buildup‚ which can reduce airflow and efficiency. Cleaning every 1-3 months is recommended‚ depending on usage and environment. Proper maintenance ensures your Bitspower fan operates smoothly‚ delivers consistent cooling‚ and prolongs its lifespan.

7.2 Ensuring Longevity of the Fan

To ensure the longevity of your Bitspower fan‚ proper installation and maintenance are essential. Avoid exposing the fan to physical stress or extreme temperatures‚ as this can damage the motor or bearings. Regularly cleaning the fan blades and housing prevents dust buildup‚ which can reduce efficiency and lifespan. Secure all cables to prevent tangling or damage‚ and use cable ties for organized management. For PWM fans‚ use a compatible controller to avoid voltage fluctuations. Ensure the fan is mounted on a stable surface to minimize vibration. Regularly inspect the fan for worn parts and replace them if necessary. By following these guidelines‚ you can extend the lifespan of your Bitspower fan and maintain its performance over time.

Advanced Installation Tips

For advanced setups‚ optimize airflow by strategically placing fans‚ use PWM for speed control‚ and manage cables neatly. This enhances cooling efficiency and system aesthetics.

8.1 Optimizing Airflow in Your System

Optimizing airflow is crucial for maintaining efficient cooling and system performance. Start by strategically placing Bitspower fans in key areas such as the front‚ top‚ or rear of the case to ensure a balanced intake and exhaust flow. Use high-quality PWM fans for precise speed control‚ allowing the system to adapt to temperature changes without unnecessary noise. Ensure proper cable management to avoid airflow obstruction‚ and consider using radiators or heat exchangers for advanced cooling setups. Regularly clean dust filters and vents to maintain unimpeded airflow. By carefully planning and executing your fan configuration‚ you can significantly improve system efficiency‚ reduce temperatures‚ and extend component longevity.

8.2 Cable Management Best Practices

Proper cable management is essential for maintaining a clean and efficient system. Use cable ties or adhesive-backed cable clips to secure fan power cables‚ RGB connectors‚ and other wires neatly behind the case or along the chassis rails. This prevents airflow obstruction and reduces dust accumulation. Route cables away from moving parts like fans and HDDs to avoid interference. Utilize modular power supplies to minimize excess cables. For RGB lighting‚ ensure the DRGB headers are securely connected and routed separately from PWM fan cables to prevent signal interference. Keep all cables organized and bundled‚ avoiding tight bends or pinching. A well-managed cable setup enhances airflow‚ improves system aesthetics‚ and reduces the risk of component damage.

Proper installation of Bitspower fans ensures optimal cooling‚ enhancing system performance and reliability. Follow these steps for a seamless setup‚ leading to improved efficiency and durability.

9.1 Final Checklist for Successful Installation

Ensure the fan is properly mounted and secured to the case for optimal airflow. Verify all power and RGB connections are securely attached to the motherboard or hub. Test the fan’s rotation and lighting functionality before closing the case. Confirm that all screws and brackets are tightly fastened to prevent vibration. Use fan control software to set desired speed and lighting profiles. Double-check cable management for a clean and organized build. Ensure the fan’s airflow path is unobstructed for maximum cooling efficiency. Review the installation manual for any specific recommendations or precautions. Finally‚ power on the system and monitor the fan’s performance to ensure everything operates smoothly.

9.2 Benefits of Proper Fan Installation

Proper installation of Bitspower fans ensures optimal cooling performance‚ reducing component temperatures and enhancing system reliability. It minimizes vibrations and noise‚ promoting a quieter computing environment. Correctly installed fans improve airflow efficiency‚ which is crucial for maintaining optimal thermal levels‚ especially in high-performance systems. Additionally‚ proper installation prevents damage to the fan or other components‚ ensuring longevity and consistent operation. Features like RGB lighting and PWM control function seamlessly when installed correctly‚ offering aesthetic and performance benefits. A well-installed fan also supports better cable management‚ contributing to a cleaner and more organized build. Overall‚ proper installation maximizes the fan’s potential‚ delivering enhanced cooling and system stability.

Additional Resources

For detailed guides‚ visit the official Bitspower website or download manuals from their support page. Additional resources include QR codes on packaging for easy access to instructions and troubleshooting tips.

10.1 Where to Find Detailed Manuals

Detailed manuals for Bitspower fans can be found on the official Bitspower website or through the product’s packaging‚ which often includes QR codes linking to downloadable guides. Additionally‚ authorized retailers and online marketplaces provide access to these manuals‚ ensuring users can easily find installation instructions tailored to their specific fan models. These resources cover technical specifications‚ step-by-step installation processes‚ and troubleshooting tips‚ making them invaluable for both novice and experienced users. By referencing these manuals‚ users ensure a smooth and successful installation process for their Bitspower fans.

10.2 Contacting Bitspower Support

For any inquiries or assistance with Bitspower fan installation‚ users can contact Bitspower support through their official website. The website provides a dedicated support section with contact forms‚ email addresses‚ and phone numbers. Additionally‚ users can submit support tickets directly through the site for detailed technical assistance. Many Bitspower products also include QR codes linking to installation guides and troubleshooting resources. For immediate help‚ customers can reach out via email or through social media platforms. Ensure to have the product model and serial number ready for faster resolution. Bitspower support is available to address installation challenges‚ warranty inquiries‚ and technical issues‚ ensuring a smooth experience for all users.

instructions form 8867

Form 8867 is a critical IRS document used by paid tax preparers to ensure due diligence for certain tax credits, including EITC and AOTC. It verifies eligibility and compliance, ensuring accurate claims and proper documentation to avoid penalties.

1.1 Overview of Form 8867

Form 8867, Paid Preparer’s Due Diligence Checklist, is an IRS form used to verify eligibility for certain tax credits, such as the Earned Income Tax Credit (EITC) and the American Opportunity Tax Credit (AOTC). It ensures paid tax preparers gather necessary client information and documentation to support credit claims. The form has been expanded to 12 pages, redesigned for clarity, and includes sections for client details and eligibility verification. Accurate completion helps avoid penalties and ensures compliance with IRS requirements, making it a crucial tool for tax professionals.

1.2 Importance of Form 8867 in Tax Filing

Form 8867 is essential for ensuring compliance with IRS regulations when claiming tax credits like EITC and AOTC. It verifies client eligibility, reducing errors and penalties. The form guides tax preparers in gathering required documentation, ensuring accurate claims. Proper completion aids in avoiding audits and delays, maintaining taxpayer trust. As a critical checklist, it streamlines the filing process, ensuring adherence to IRS standards and promoting efficient tax preparation. Its role is vital in upholding the integrity of tax credit claims and preparer accountability.

What is Form 8867?

Form 8867 is a checklist used by paid tax preparers to ensure due diligence when claiming tax credits like EITC and AOTC, verifying eligibility and compliance.

2.1 Definition and Purpose

Form 8867, Paid Preparer’s Due Diligence Checklist, ensures tax preparers verify eligibility for credits like EITC and AOTC. It requires documentation checks to prevent errors and penalties, ensuring accurate claims by confirming client information and qualifying criteria, thus maintaining compliance with IRS regulations. Proper completion aids in avoiding audits and penalties, ensuring smooth tax filing processes for both preparers and taxpayers.

2.2 Tax Credits Covered by Form 8867

Form 8867 covers key tax credits, primarily the Earned Income Tax Credit (EITC) and the American Opportunity Tax Credit (AOTC). It ensures proper documentation and verification for these credits, reducing errors and non-compliance risks; By focusing on these specific credits, the form streamlines the due diligence process, helping preparers accurately assess eligibility and adhere to IRS guidelines, thereby preventing potential penalties and ensuring lawful tax credit claims.

Eligibility Criteria for Using Form 8867

Form 8867 is specifically for paid tax preparers to ensure due diligence when claiming tax credits like EITC and AOTC, requiring accurate client information and documentation.

3.1 Who Should Complete Form 8867?

Form 8867 must be completed by paid tax return preparers who assist clients in claiming specific tax credits, such as the Earned Income Tax Credit (EITC) and the American Opportunity Tax Credit (AOTC). These preparers are required to ensure thorough due diligence, verifying all necessary client information and documentation to support the claimed credits. The form acts as a checklist to ensure compliance with IRS regulations, helping to prevent errors and penalties associated with inaccurate or incomplete claims. Proper completion is essential for maintaining the integrity of the tax filing process.

3.2 Conditions for Claiming Tax Credits

Specific conditions must be met for each tax credit claimed, such as income limits, filing status, and eligibility criteria. For the Earned Income Tax Credit (EITC), taxpayers must have earned income and meet certain thresholds. The American Opportunity Tax Credit (AOTC) requires enrollment in higher education. Proper documentation, like Social Security numbers and proof of eligibility, is essential. Failure to meet these conditions can result in penalties or disallowance of the credits, emphasizing the importance of accurate Form 8867 completion.

Instructions for Completing Form 8867

Ensure accurate information and required documentation are gathered. Verify each section thoroughly, following IRS guidelines to avoid errors and penalties. Proper completion ensures compliance and valid tax credit claims.

4.1 Required Information and Documentation

To complete Form 8867 accurately, gather essential client information, including Social Security numbers, income verification, and proof of eligibility for claimed tax credits. Ensure all required documents, such as W-2s, 1099s, and proof of filing status, are collected and reviewed. Verify the accuracy of data to meet IRS due diligence standards. Missing or incomplete information can lead to penalties or delayed processing. Proper documentation ensures compliance and supports valid tax credit claims, avoiding potential audits or disputes. Thorough preparation is critical for a smooth filing process.

4.2 Step-by-Step Guide to Filling Out the Form

Begin by entering the client’s name, Social Security number, and filing status in Section A. Next, check the appropriate boxes for the tax credits being claimed, such as EITC or AOTC. Gather and verify all necessary documents, including W-2s, 1099s, and proof of eligibility. Ensure all questions are answered accurately, skipping irrelevant sections like questions 9b and 9c if no qualifying child is claimed. Review each section for completeness and accuracy before finalizing. Finally, ensure the preparer’s signature and date are included for certification.

Key Sections of Form 8867

Form 8867 includes Section A for client information and Section B for tax credit eligibility, ensuring accurate documentation and compliance with IRS requirements for EITC and AOTC claims.

5.1 Section A: Client Information

Section A requires accurate client details, including name, Social Security number, and filing status. This ensures proper identification and verification, essential for processing tax credits like EITC and AOTC. The preparer must review and confirm all information for accuracy, as errors here can lead to delays or rejection of claims; Proper documentation is critical to maintain compliance with IRS guidelines and avoid potential penalties. Attention to detail in this section is vital for a smooth filing process.

5.2 Section B: Tax Credit Eligibility

Section B focuses on verifying eligibility for tax credits like EITC and AOTC. It includes checkboxes for each credit and filing status, ensuring accurate claims. The preparer must confirm the taxpayer meets all criteria, such as income limits and educational expenses. Proper documentation is essential to support eligibility and prevent audits. Errors in this section can delay processing or result in denied credits. Preparers must ensure all information aligns with IRS guidelines to maintain compliance and avoid penalties for incomplete or inaccurate submissions. Attention to detail is crucial for successful credit claims.

Tax Credits Covered by Form 8867

Form 8867 covers key tax credits like the Earned Income Tax Credit (EITC) and the American Opportunity Tax Credit (AOTC), ensuring accurate eligibility verification and compliance with IRS requirements.

6.1 Earned Income Tax Credit (EITC)

The Earned Income Tax Credit (EITC) is a refundable credit for low-to-moderate income workers. Form 8867 ensures preparers verify eligibility, including income, filing status, and qualifying children, to prevent errors and audits. Proper documentation, such as Social Security numbers and proof of residency, must be checked. The form helps avoid penalties by ensuring all EITC requirements are met before claiming the credit on a taxpayer’s return.

6.2 American Opportunity Tax Credit (AOTC)

The American Opportunity Tax Credit (AOTC) provides tax relief for education expenses, offering up to $2,500 per eligible student. Form 8867 ensures preparers verify eligibility, including enrollment status, degree pursuit, and qualified education costs. A Social Security number is required for the student. Paid preparers must document tuition payments and academic periods to comply with IRS rules. Accurate completion helps avoid penalties and ensures the credit is claimed correctly for qualifying higher education expenses.

Due Diligence Requirements

Form 8867 ensures paid preparers verify client eligibility and documentation for tax credits, requiring thorough checks to comply with IRS due diligence standards and avoid penalties.

7.1 Paid Preparer Responsibilities

Paid preparers must ensure accuracy and compliance by verifying client information, checking appropriate boxes for tax credits, and ensuring the SSN is present. They must handle multiple credits carefully, adhering to due diligence. Failure to comply may result in penalties. Proper documentation and verification are essential to avoid issues. The form has expanded to 12 pages, improving clarity and ensuring thorough compliance with IRS requirements for accurate tax credit claims.

7.2 Verification of Client Information

Verifying client information is crucial to ensure accuracy. Preparers must check Social Security numbers, qualifying children details, and filing status. Skipping relevant questions, like 9b and 9c for childless EITC claims, is necessary. Proper documentation and eligibility checks prevent audits and penalties. Ensuring all details align with IRS guidelines helps in smooth processing of tax credits like EITC and AOTC, avoiding delays or rejections.

Common Mistakes to Avoid

Common mistakes include errors in client information and omissions in required documentation. Skipping relevant questions, like those for childless EITC claims, can lead to processing delays and penalties.

8.1 Errors in Client Information

Errors in client information are common and can delay processing. Typos in names, incorrect Social Security numbers, and mismatched addresses often occur. Ensure all data matches official documents. For child-related credits, incorrect child information or missing details can trigger audits. Verifying each entry carefully is crucial to avoid rejections or penalties. Paid preparers must cross-check client-provided data with official records to ensure accuracy and compliance with IRS requirements, preventing unnecessary delays or additional scrutiny. Attention to detail is essential for smooth processing of tax credits.

8.2 Omissions in Required Documentation

Omissions in required documentation are a frequent issue, leading to delays or rejection of tax credit claims. Missing or incomplete records, such as birth certificates for child-related credits or Social Security verification, can trigger audits. Ensure all necessary documents, like income statements and residency proofs, are included. Paid preparers must verify that clients provide all relevant paperwork to support their eligibility. Incomplete submissions can result in penalties or denied credits, emphasizing the importance of thoroughness in gathering and reviewing all required documents before filing.

Signature and Certification

The preparer must sign and date Form 8867, certifying that due diligence was performed. This ensures compliance with IRS requirements and confirms the accuracy of the information provided.

9.1 Preparer’s Signature Requirements

The paid tax return preparer must sign and date Form 8867, confirming they have completed the due diligence checklist; The preparer’s PTIN (Preparer Tax Identification Number) must also be included. This signature certifies that all necessary client information was verified and that the eligibility criteria for the claimed tax credits were met. Failure to sign or provide accurate information may result in penalties. The signature serves as a legal affirmation of compliance with IRS due diligence standards for tax credit claims.

9.2 Certification Statement

The certification statement on Form 8867 requires the preparer to affirm that they have fulfilled all due diligence requirements. This includes verifying client eligibility for tax credits and ensuring accurate documentation. The statement must be signed and dated, acknowledging that any false claims may result in penalties. It serves as a legal confirmation of the preparer’s compliance with IRS guidelines, emphasizing the importance of accuracy and thoroughness in the tax credit application process. Preparers must understand the legal implications of this certification to avoid potential consequences.

Submission and Filing

Form 8867 must be submitted alongside the taxpayer’s return, either electronically or by mail. Adhering to IRS deadlines is crucial to avoid penalties and ensure timely processing. Failure to file accurately may delay refunds or impact credit eligibility, emphasizing the importance of compliance with submission requirements. Preparers must ensure all fields are completed correctly before submission to prevent any issues or additional scrutiny from the IRS.

10.1 How to Submit Form 8867

To submit Form 8867, it must accompany the taxpayer’s return, either electronically through IRS e-file or by mailing the paper return. Ensure accuracy and completeness to prevent processing delays or penalties. Paid preparers must sign and date the form, verifying all information. Submission deadlines align with the taxpayer’s return filing due date. Properly attach Form 8867 to avoid separation during processing. Follow IRS guidelines for electronic submission requirements, as paper filing may require additional steps. Timely and correct submission ensures smooth processing and maintains eligibility for claimed tax credits.

10.2 Filing Deadlines and Penalties

Form 8867 must be submitted by the taxpayer’s return filing deadline, typically April 15th, unless extended. Missing the deadline or submitting an incomplete form may result in penalties, including fines and delayed refunds. Inaccuracies or omissions can lead to audits or denial of claimed credits. Ensure all sections are complete and accurate to avoid penalties. Paid preparers must adhere to deadlines to maintain compliance and prevent adverse actions. Timely filing is crucial for smooth processing and maintaining eligibility for tax credits without additional IRS scrutiny or financial repercussions.

Consequences of Non-Compliance

Non-compliance with Form 8867 can lead to penalties, audits, and denial of tax credits. Inaccuracies may result in fines and delayed refunds, impacting future claims.

11.1 Penalties for Incomplete or Inaccurate Forms

Failing to complete Form 8867 accurately can result in significant penalties, including fines and loss of tax credits. Preparers may face IRS audits and legal action, while clients risk delayed refunds and denied claims. Incomplete or incorrect information can lead to additional scrutiny, impacting both preparer reputation and client financial standing. It is crucial to ensure all sections are filled out correctly to avoid these consequences and maintain compliance with IRS regulations.

11.2 Impact on Tax Credit Claims

Inaccuracies or omissions on Form 8867 can lead to denied or delayed tax credit claims, affecting clients’ financial outcomes. The IRS may disallow credits like EITC or AOTC if documentation is insufficient or improper. This can result in reduced refunds or additional taxes owed. Paid preparers must ensure meticulous completion to prevent loss of eligible credits and maintain client trust. Errors can also trigger audits, further complicating the tax filing process for both preparers and taxpayers.

Resources and Assistance

Consult IRS guidelines, publications like Pub. 596, and professional tax preparer resources for detailed instructions and support with Form 8867 completion and compliance requirements.

12.1 IRS Guidelines and Publications

The IRS provides detailed guidelines and publications, such as Pub. 596, to assist with Form 8867 completion. These resources explain eligibility criteria, documentation requirements, and tax credit specifics. The IRS website offers updated forms, instructions, and FAQs to ensure accurate filing. Tax professionals can also access manuals and training materials to stay informed about form changes, such as the recent redesign from 10 to 12 pages. Regularly reviewing IRS publications ensures compliance with the latest regulations and avoids penalties.

12.2 Professional Help for Tax Preparers

Tax preparers can access professional assistance through IRS resources, such as webinars, workshops, and publications like Pub. 596. These tools provide clarity on Form 8867 requirements and tax credit eligibility. Additionally, professional associations offer training and support to ensure accurate form completion. Paid preparers can also consult IRS guidelines for updates, such as the recent expansion of Form 8867 from 10 to 12 pages, ensuring they remain compliant with the latest regulations and avoid errors in client documentation and claims.

Form 8867 ensures compliance with tax credit requirements, such as EITC and AOTC. Accurate completion is vital to avoid penalties and support valid claims, safeguarding both taxpayers and preparers.

13.1 Summary of Key Points

Form 8867 is a checklist for paid preparers to ensure due diligence when claiming tax credits like EITC and AOTC. It verifies eligibility, gathers required documents, and ensures compliance with IRS rules. Proper completion avoids penalties and supports valid claims. The form requires accurate client information, verification of qualifications, and adherence to specific guidelines. Understanding its purpose and following instructions carefully is essential for both preparers and taxpayers to navigate the tax credit process effectively and maintain compliance with IRS standards.

13.2 Final Tips for Accurate Completion

Ensure all client information is verified and documentation is complete before submission. Double-check boxes for tax credits like EITC and AOTC to confirm eligibility. Skip irrelevant sections, such as questions about qualifying children if none apply. Always include the required Social Security Number (SSN) for accurate processing. Review the entire form for errors or omissions to avoid delays or penalties. Adhere to IRS guidelines and seek professional assistance if unsure about any step. Accurate and thorough completion ensures compliance and valid tax credit claims.

raynor garage door opener manual

Welcome to the Raynor Garage Door Opener Manual․ This guide provides essential information for safe installation‚ operation‚ and maintenance of your garage door opener system․

1․1 Overview of Raynor Garage Door Openers

Raynor garage door openers are high-quality systems designed for reliability and ease of use․ Available in various models‚ such as Admiral II and Sergeant II‚ these openers offer advanced features like Wi-Fi compatibility and Security 2․0 technology․ They are equipped with the Protector System for enhanced safety and are compatible with MyQ for smart home integration․ Raynor openers are known for their durability and quiet operation‚ making them a popular choice for residential use․ They are available in chain and belt drive options‚ catering to different preferences and needs․

1․2 Importance of Reading the Manual

Reading the Raynor garage door opener manual is crucial for safe and proper installation‚ operation‚ and maintenance․ It provides detailed instructions‚ safety precautions‚ and troubleshooting tips․ The manual ensures users understand all features‚ including MyQ and Security 2․0 compatibility․ Failure to follow instructions may void the warranty or lead to unsafe conditions․ It also helps users identify compatible accessories and understand error codes․ Fastening the manual near the garage door ensures easy reference․ Proper use of the opener depends on understanding the information provided in this guide․

1․3 Safety Precautions and Warnings

Always read and follow the safety materials enclosed with the Raynor garage door opener manual․ Ensure the Protector System is connected and properly aligned to prevent accidents․ Fasten the manual near the garage door for easy reference․ Avoid serious injury by securely mounting the opener to structural supports․ Periodic checks are required to ensure safe operation․ The opener is only compatible with MyQ and Security 2․0 accessories․ Failure to follow instructions may void the warranty or lead to unsafe conditions․ Proper installation and maintenance are critical for optimal performance and user safety․

Safety Guidelines and Precautions

Ensure the garage door opener is securely mounted and properly aligned․ Read the manual carefully to avoid potential hazards and ensure safe operation of the system․

2․1 General Safety Instructions

General safety instructions are crucial for ensuring the proper and secure operation of your Raynor garage door opener․ Always read the manual thoroughly before installation or use․ Ensure the opener is securely fastened to prevent accidents․ Avoid wearing loose clothing that could get caught in moving parts․ Keep children and pets away from the door and opener․ Regularly inspect the system for wear and tear․ Never attempt repairs without following safety guidelines; Fasten the manual near the garage door for easy reference and adhere to all warnings provided․

2․2 Warning Tags and Labels

Warning tags and labels are essential for ensuring safe operation of your Raynor garage door opener․ These tags provide critical safety information and must be mounted in visible locations as instructed in the manual․ Pay special attention to warnings regarding proper installation‚ operation‚ and maintenance․ For example‚ the Protector System must be connected and aligned correctly for the door to function․ Failure to follow these warnings can result in serious injury or damage․ Always review and comply with all safety instructions to ensure the opener operates safely and efficiently․ Mount all tags as directed to maintain visibility and adherence to safety protocols․

2․3 Proper Use of the Garage Door Opener

Proper use of the Raynor garage door opener ensures safe and efficient operation․ Always install the opener on a properly balanced and lubricated garage door‚ as outlined in the manual․ Regularly inspect and maintain the system to prevent malfunctions․ The Protector System must be correctly aligned to ensure the door closes safely․ Only use compatible accessories‚ such as MyQ and Security 2․0 features‚ for optimal performance․ Avoid modifying the opener or using unauthorized parts‚ as this can void the warranty․ Keep the opener out of reach of children and unauthorized users․ Refer to the manual for troubleshooting and maintenance tips to ensure longevity and safety․

System Components and Features

The Raynor garage door opener includes key components like the motor‚ rail‚ and trolley‚ with advanced features such as MyQ compatibility and Security 2․0 technology for enhanced functionality․

3․1 Key Components of the Raynor Garage Door Opener

The Raynor garage door opener consists of a powerful DC motor‚ durable chain or belt drive‚ and a robust trolley system․ It includes a rail‚ safety sensors‚ and a control panel․ Additional components are the remote control‚ wall button‚ and a battery backup for uninterrupted operation during power outages․ Each part is designed for reliability and smooth performance‚ ensuring efficient and quiet operation of your garage door․ Proper installation and maintenance of these components are vital for optimal functionality․

3․2 Features of the MyQ and Security 2․0 Compatibility

Raynor garage door openers are compatible with MyQ and Security 2․0 technologies‚ offering enhanced smart home integration and advanced security․ MyQ technology allows users to control and monitor their garage door via a smartphone app‚ providing real-time notifications and remote operation․ Security 2․0 ensures superior protection with rolling code encryption‚ preventing unauthorized access․ These features integrate seamlessly‚ offering convenience‚ security‚ and peace of mind․ Proper setup and alignment are required for optimal performance‚ as outlined in the manual․

3․3 Understanding the Protector System

The Protector System is a critical safety feature designed to prevent accidents and injuries․ It ensures the garage door does not close unless properly aligned and clear of obstacles․ The system must be connected and correctly adjusted for the door to function․ Failure to align or connect the Protector System will prevent the door from closing‚ ensuring safety․ Proper installation and periodic checks are essential to maintain its effectiveness․ Refer to the manual for detailed setup and maintenance instructions to ensure optimal performance and safety․

Installation Instructions

Follow the step-by-step guide to install your Raynor garage door opener securely․ Fasten it to structural supports using lock washers and hex bolts․ Ensure proper alignment and refer to the manual for detailed instructions to avoid installation issues․

4․1 Pre-Installation Checklist

Before starting installation‚ ensure your garage door is properly balanced and lubricated․ Verify compatibility of the opener with your door type and size․ Gather all necessary tools and hardware provided․ Read the manual thoroughly to understand safety precautions and instructions․ Ensure the area is clear of obstacles․ Check for any damaged or missing parts․ Confirm the opener model matches your garage door specifications․ Secure the manual near the garage door for future reference․ Ensure all warning tags are properly mounted as per instructions․

4․2 Mounting the Garage Door Opener

Mount the garage door opener securely to structural supports to avoid potential injury from a falling unit․ Use a level to ensure proper alignment during installation․ Fasten the opener tightly with provided hardware‚ following the manual’s instructions․ Avoid loose mounting‚ as it may lead to malfunction․ Place the opener on a protective base‚ such as the packing material‚ to prevent damage during installation․ Double-check all connections before proceeding to the next step․ Ensure the unit is centered and aligned with the garage door for optimal performance and safety․

4․3 Assembling and Aligning the Tracks

Begin by carefully unboxing and organizing all track components․ Attach the track sections to the garage door‚ ensuring they align properly․ Secure the rear track to the wall using the provided hardware․ Adjust the trolley alignment to match the door’s movement․ Tighten all bolts firmly but avoid over-tightening․ Double-check the tracks for levelness and proper spacing․ Misaligned tracks can cause operational issues․ Refer to the manual for specific torque specifications and alignment guidelines to ensure smooth and safe operation of the garage door opener system․

4․4 Wiring and Electrical Connections

Connect the power supply to the garage door opener‚ ensuring it matches the voltage specified in the manual․ Mount the control panel near the door‚ following installation instructions․ Wire the sensors and safety devices‚ securing connections with the provided clips․ Test all electrical components to ensure proper function․ Avoid overloading circuits and keep wiring organized․ Refer to the diagram for correct terminal connections․ Ensure all wires are safely routed to prevent damage or tripping hazards‚ adhering to local electrical codes for a secure setup․

Configuration and Setup

Configure your Raynor garage door opener by programming the remote control and setting up MyQ features․ Adjust the open and close limits for smooth operation․

5․1 Programming the Remote Control

Programming your Raynor garage door opener remote control ensures secure and convenient operation․ Locate the “Learn” button on the motor unit‚ typically near the antenna․ Press and release it to enter programming mode․ Within 30 seconds‚ press the remote control button you wish to program․ The opener will confirm synchronization․ Test the remote to ensure proper function․ For additional remotes‚ repeat the process․ Always refer to your manual for specific model instructions․ Ensure the garage door is properly balanced and lubricated before programming․

5․2 Setting Up the MyQ and Security 2․0 Features

Setting up MyQ and Security 2․0 enhances your garage door opener’s functionality and security․ Download the MyQ app and follow in-app instructions to register and connect your opener․ Ensure the opener is compatible with MyQ and Security 2․0․ Enable notifications for real-time alerts․ Secure your system with rolling code technology to prevent unauthorized access․ Refer to the manual for specific model instructions․ This setup ensures remote monitoring and control‚ providing convenience and peace of mind․

5․3 Adjusting the Open and Close Limits

Adjusting the open and close limits ensures your garage door operates smoothly․ Press and hold the learn button‚ then activate the door to auto-calibrate․ Use the up and down arrows to fine-tune the limits․ Ensure the door fully opens and closes without obstruction․ Test the door to confirm proper alignment․ Refer to the manual for specific instructions‚ as improper settings may cause safety issues․ Always verify the Protector System is connected and aligned before adjusting limits to ensure safe operation and prevent accidents․

Operation and Maintenance

Regular maintenance ensures optimal performance․ Lubricate moving parts annually and inspect tracks for alignment․ Refer to the manual for detailed care instructions and troubleshooting tips․

6․1 Daily Operation of the Garage Door Opener

Ensure the garage door opener operates smoothly by following daily usage guidelines․ Always check the Protector System alignment before closing the door․ Verify compatibility with MyQ and Security 2․0 features for seamless smart operation․ Perform periodic visual inspections to identify potential issues early․ Avoid using the opener if the door is unbalanced or damaged․ Refer to the manual for specific operating instructions and safety precautions to maintain optimal functionality and ensure user safety․

6․2 Periodic Maintenance Checks

Regular maintenance ensures reliable performance and extends the lifespan of your Raynor garage door opener․ Inspect the tracks for alignment and cleanliness‚ lubricate moving parts annually‚ and check the Protector System for proper alignment․ Verify electrical connections and test remote functionality․ Replace worn or damaged components promptly․ Schedule professional inspections if issues arise․ Follow the manual’s guidelines to maintain safety and efficiency‚ ensuring your garage door operates smoothly year-round․ Consistent upkeep prevents unexpected malfunctions and enhances overall system reliability․

6․3 Lubrication and Cleaning Instructions

Regular lubrication and cleaning are essential for maintaining your Raynor garage door opener’s performance․ Apply a silicone-based spray lubricant to moving parts like rollers‚ hinges‚ and springs annually․ Clean the tracks with a soft cloth to remove dirt and debris‚ ensuring proper alignment․ Avoid using harsh chemicals or abrasive materials․ Wipe down the motor and control panel with a dry cloth; For optimal function‚ inspect and clean the Protector System sensors․ Disconnect power before performing any maintenance․ Lubrication and cleaning help prevent wear‚ reduce noise‚ and ensure smooth operation of your garage door opener․

Troubleshooting Common Issues

This section addresses common issues like error codes‚ sensor malfunctions‚ and operational failures․ Refer to the manual for troubleshooting steps and manufacturer-recommended solutions․

7․1 Common Problems and Solutions

Common issues with Raynor garage door openers include error codes‚ sensor misalignment‚ and remote control malfunctions․ Error codes often indicate specific faults‚ such as sensor obstructions or motor overload․ Sensor issues can prevent the door from closing if alignment is off or debris blocks the beam․ For remote control problems‚ reprogramming or replacing the batteries may resolve the issue․ Always consult the manual for troubleshooting steps and reset procedures․ If problems persist‚ contact Raynor customer support for assistance․

7․2 Error Codes and Their Meanings

Raynor garage door openers display error codes to indicate specific issues․ For example‚ error code 1 signals sensor misalignment‚ while code 2 points to a motor overload․ Code 3 suggests a faulty safety sensor‚ and code 4 indicates excessive travel limits․ These codes help diagnose problems quickly․ Refer to the manual for detailed explanations and solutions; Always address errors promptly to ensure safe and proper operation of your garage door opener system․

7․3 Resetting the Garage Door Opener

To reset your Raynor garage door opener‚ start by disconnecting power for 30 seconds․ This resets the system․ Reconnect power and test operation․ For models like the Pilot 1265RGD‚ press and hold the learn button until the LED blinks․ Release and press again to confirm․ Some models require resetting the travel limits after a power cycle․ Always refer to your specific model’s manual‚ such as the Admiral II or Sergeant II‚ for precise reset instructions․ This ensures proper functionality and safety․ Regular resets can resolve minor issues effectively․

Warranty and Repair Information

Raynor offers a one-year limited warranty and a lifetime motor warranty․ Proper installation and maintenance are crucial to uphold warranty terms․ For repairs‚ genuine parts and customer support are available․

8․1 Understanding the Warranty Terms

Raynor’s warranty ensures coverage for defects in materials and workmanship․ The warranty period varies by component‚ with a one-year limited warranty for most parts and a lifetime warranty for the motor․ Proper installation by authorized personnel is mandatory to maintain warranty validity․ Misuse or unauthorized modifications can void the warranty․ Regular maintenance‚ as outlined in the manual‚ is required to uphold coverage․ Refer to the warranty section for detailed terms and conditions․

8․2 Repair Parts and Accessories

Raynor offers a range of repair parts and accessories to maintain your garage door opener’s optimal performance․ These include replacement remotes‚ sensors‚ and trolley systems․ Ensure all parts are compatible with your specific model‚ such as MyQ and Security 2․0-enabled devices․ Genuine Raynor accessories guarantee reliability and safety․ For details on compatible parts‚ refer to the manual or visit the Raynor website․ Proper installation of these parts is crucial to maintain warranty coverage and ensure smooth operation․ Always verify the model number before purchasing any replacement components․

8․3 Contacting Raynor Customer Support

For assistance with your Raynor garage door opener‚ contact Raynor Customer Support․ Visit their website at www․raynor․com or call their support team for troubleshooting and repair inquiries․ You can also email them for detailed assistance․ Their office is located at 1101 E․ River Road‚ Dixon‚ Illinois 61021․ Ensure to provide your model number and a detailed description of the issue for prompt service․ Raynor’s customer support is available to help resolve any concerns and ensure your garage door opener operates safely and efficiently․

Compatibility and Integration

Raynor garage door openers are compatible with MyQ and Security 2․0 systems‚ ensuring seamless integration with smart home devices for enhanced convenience and security․

9․1 Compatible Accessories and Systems

Raynor garage door openers are designed to work seamlessly with a range of accessories and systems․ The MyQ and Security 2․0 technologies ensure compatibility with smart home devices‚ allowing for remote monitoring and control․ Additionally‚ Raynor systems integrate with popular smart home platforms like Amazon Alexa and Google Assistant․ Compatible accessories include remote controls‚ keyless entry pads‚ and sensors․ For a full list of compatible products‚ visit the official Raynor website or consult the product manual for detailed specifications and pairing instructions․

9․2 Integration with Smart Home Devices

Raynor garage door openers seamlessly integrate with smart home systems‚ enhancing convenience and security․ Compatibility with MyQ and Security 2․0 technologies allows users to control their garage doors via smartphones․ Popular platforms like Amazon Alexa and Google Assistant enable voice commands․ This integration ensures remote monitoring‚ customizable notifications‚ and effortless operation․ For detailed setup instructions‚ refer to the manual or visit Raynor’s official website to explore compatible devices and step-by-step integration guides․

9․3 Upgrading Your Garage Door Opener

Upgrading your Raynor garage door opener enhances performance and adds modern features․ Check for compatible upgrade kits on Raynor’s website to ensure system compatibility․ Follow the manual’s instructions for installing new components like MyQ or Security 2․0 modules․ Always power down the opener before starting upgrades․ Contact Raynor customer support if unsure about compatibility or installation steps․ Regular updates ensure optimal functionality and security for your garage door system․

Downloading the Manual and Resources

Raynor garage door opener manuals are available for download in PDF format from the official Raynor website․ Access guides‚ troubleshooting tips‚ and maintenance resources easily online․

10․1 Accessing the PDF Manual Online

To access the Raynor garage door opener manual‚ visit the official Raynor website․ Navigate to the support section and enter your model number; Download the PDF manual directly to your device for easy reference․ Ensure you have the correct model number for accurate information․ The manual covers installation‚ operation‚ and troubleshooting․ Save or print it for future use․ Accessing the manual online is quick‚ convenient‚ and ensures you have the latest updates․

10․2 Additional Resources and Guides

Beyond the manual‚ Raynor offers additional resources to enhance your experience․ These include troubleshooting guides‚ maintenance tips‚ and warranty information․ Visit the Raynor website for detailed PDF guides specific to your model․ Troubleshooting sections address common issues like faulty remotes or uneven door alignment․ Maintenance guides provide step-by-step instructions for lubrication and part replacement․ Warranty details outline coverage and claim procedures․ These resources ensure optimal performance and longevity of your garage door opener․ Refer to the official Raynor website for the most up-to-date information․

10․3 Updating Your Garage Door Opener Software

Regular software updates ensure your Raynor garage door opener operates with the latest features and security patches․ To update‚ disconnect power to the opener and use a compatible smartphone or tablet with the MyQ app․ Check for firmware updates in the app settings and follow the on-screen instructions․ Ensure your device is connected to the opener via Wi-Fi for a smooth update process․ Never use unauthorized software‚ as it may void the warranty or compromise functionality․ Always refer to the manual for specific update instructions tailored to your model․

Advanced Features and Customization

Explore advanced features like smart home integration and customizable settings through the MyQ app‚ enhancing convenience and control for your Raynor garage door opener․

11․1 Customizing Your Garage Door Opener Settings

Customize your Raynor garage door opener settings using the MyQ app for enhanced functionality․ Adjust remote control functions‚ opener sensitivity‚ and scheduling for personalized convenience․ Enable smart notifications and voice control for seamless integration with smart home systems․ Access advanced settings to fine-tune door movement and lighting options․ Refer to the manual for detailed instructions on configuring these features to suit your preferences and ensure optimal performance․ Proper customization ensures a tailored experience‚ improving security and user satisfaction․

11․2 Using Advanced Security Features

Raynor garage door openers offer advanced security features for enhanced protection․ Enable rolling code encryption to prevent unauthorized access and ensure secure remote operations․ Use the MyQ app to monitor and control your garage door remotely‚ receiving real-time notifications․ Activate security alerts for suspicious activity and set up temporary access codes for guests․ These features provide peace of mind and protect your property from potential breaches․ Adjust settings via the manual to customize your security preferences and ensure maximum safety․

11․3 Customizing the Remote Control Functions

Customize your Raynor garage door opener remote control to suit your needs․ Program the remote by pressing the learn button on the motor unit and following the manual’s instructions․ Ensure compatibility with MyQ and Security 2․0 features for seamless integration․ Assign specific buttons to control different garage doors or accessories․ Refer to the manual for model-specific instructions‚ such as Admiral II or Pilot series․ Customize settings to enhance convenience and security‚ including temporary access codes or button assignments for multiple users․

FAQs and Common Questions

Frequently asked questions about Raynor garage door openers address installation‚ operation‚ and troubleshooting․ Find solutions for common issues like remote malfunction or door alignment problems․

12․1 Frequently Asked Questions

Users often inquire about compatibility‚ troubleshooting‚ and maintenance․ Common questions include remote programming‚ error codes‚ and MyQ setup․ Others ask about warranty terms and repair parts․ Many seek solutions for issues like door misalignment or opener noise․ Additionally‚ queries about software updates and system integration with smart devices are frequent․ These FAQs provide clear‚ concise answers to help users resolve issues efficiently and ensure optimal performance of their Raynor garage door opener․

12․2 Common User Queries and Solutions

Users frequently ask about resolving issues like unresponsive remotes‚ which often require reprogramming․ Others inquire about error codes‚ such as E1 or E2‚ indicating sensor alignment problems․ Some seek solutions for noisy operation‚ suggesting lubrication of moving parts․ Queries about MyQ app connectivity issues are also common‚ typically resolved by updating software or checking network connections․ Additionally‚ questions arise about warranty coverage and replacement parts for damaged components․ These solutions help users address common challenges effectively and maintain smooth functionality of their Raynor garage door opener system․

12․3 Tips for Optimal Performance

Regular lubrication of moving parts ensures smooth operation․ Schedule annual maintenance to inspect and tighten hardware․ Ensure the door is balanced and aligned properly․ Clear obstacles from the door’s path to prevent damage․ Update your MyQ app and garage door opener software periodically for enhanced features and security․ Refer to the manual for specific care instructions tailored to your Raynor model‚ ensuring longevity and reliable performance of your garage door opener system․